
If you’ve ever driven down the highway with a ladder rack on your vehicle, you may have noticed an annoying humming, buzzing, or howling sound that kicks in around 60 mph. This wind noise is not just irritating. It is a sign of aerodynamic turbulence caused by how air flows over and around the rack. The primary culprit is vortex shedding, a fluid dynamics phenomenon where air separates unevenly from the rear edge of the ladder rack’s vertical bar, creating rhythmic pressure waves that translate into noise. Vehicles like the Ford Escape and Dodge Pro Master City are especially prone, with some drivers reporting noise starting as low as 15 mph in headwinds.
The good news is that ladder rack wind noise is fixable. You do not need to remove your rack or live with the drone. With proven DIY methods and commercial solutions, you can eliminate the sound entirely, often for under $20. This guide covers every effective fix, from wrapping a simple nylon rope around a crossbar to installing precision-engineered wind deflectors. You will learn exactly why the noise happens, how to stop it fast, and how to keep your rack functional and quiet for years.
Fix Vortex Shedding at the Source
The key to stopping ladder rack wind noise lies in disrupting the formation of coherent vortices. Those swirling pockets of air generate a resonant hum when they shed off the rear vertical bar. By altering the airflow at this critical point, you break the cycle of noise production.
Wrap the Rear Vertical Bar with Nylon Rope
One of the most effective and low-cost solutions is wrapping a half-inch nylon rope around the rear-facing vertical bar of your ladder rack. This simple DIY hack works by introducing surface irregularities that scatter the airflow, preventing the organized vortex pattern that causes the drone.
Materials needed:
– Half-inch diameter nylon rope
– Lighter
– Scissors
Steps to apply:
1. Cut a length of half-inch diameter nylon rope available at hardware or marine stores.
2. Begin wrapping tightly around the rear vertical bar, the one directly facing the back of the vehicle.
3. Overlap each wrap slightly to ensure full coverage of the bar’s circumference.
4. Tie the ends securely with a square knot or double overhand knot.
5. Use a lighter to melt the rope ends, sealing them to prevent fraying.
This method has been tested across multiple vehicle types, including extended cab trucks and cargo vans. It consistently delivers near-total noise elimination. It is non-invasive, reversible, and costs less than $10. The rope blends into the rack’s profile, so visual impact is minimal.
Pro tip: Test the wrap on one bar first. If noise drops significantly, apply to all rear-facing verticals in the overhang zone.
Why Rope Works: Aerodynamic Disruption
Smooth, cylindrical bars are vortex factories. When wind hits them perpendicularly, it separates cleanly and alternates side-to-side in a repeating pattern. This is what creates the monotone hum. The rope adds texture and changes the bar’s effective shape, causing the air to separate chaotically instead of rhythmically. No rhythm means no resonance and no noise.
Nylon is ideal because it is UV-resistant, weatherproof, durable under vibration, and easy to install and remove. Once the ends are melted, the rope lasts for years without maintenance.
Install a Wind Deflector for Lasting Results

If you want a cleaner, more permanent solution, a wind deflector is your best bet. These accessories redirect airflow before it hits the rack, eliminating turbulence at the source rather than managing its effects.
Use a Clamp-On Wind Deflector
The Rack-it Inc. Clamp-On Wind Deflector is a top-rated option designed specifically for ladder racks. It attaches to the front crossbar and angles upward to guide wind over the rack structure.
Key features:
– Adjustable pivot mechanism lets you fine-tune the angle for optimal airflow
– Clamp-on design requires no drilling or permanent modification
– Fits all Rack-it 38-inch truck racks
– Available in gloss black, textured black, silver, or white with powder-coated finish
– Includes all mounting hardware
This deflector is especially effective on extended cab and crew cab trucks, where longer overhangs increase the chance of wind striking the front bar directly.
How It Reduces Noise
Instead of allowing wind to roll off the windshield and slam into the front crossbar, the deflector lifts airflow upward, smooths transition over the rack, and prevents downward deflection onto the roof. This mimics the natural aerodynamic flow the vehicle was designed for, reducing pressure fluctuations and eliminating the conditions for vortex shedding.
User note: Some people are more sensitive to high-frequency wind noise. Even a small deflector can make a noticeable difference in cabin comfort.
Optimize Cross Bar Placement
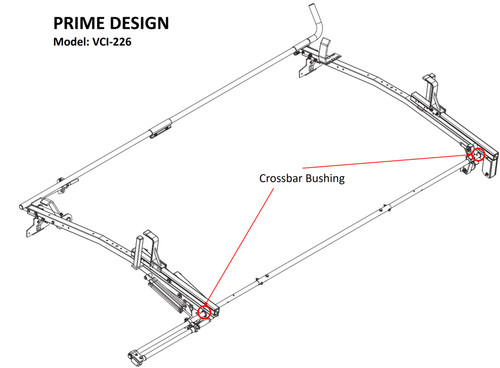
Fixed cross bars, especially those mounted in the overhang area above the cab, can amplify wind noise by adding more surfaces for airflow to interact with. The longer the span between vertical supports, the more likely it is to act as a resonant surface.
Switch to Removable Cross Bars
Using removable cross bars gives you control over when and where noise-generating components are installed.
Best practices:
– Remove cross bars when not carrying a load
– Relocate them behind the cab during highway driving
– Only install them in the overhang zone when transporting long materials
This strategy reduces the number of vortex-producing edges exposed to direct airflow, significantly lowering noise levels.
Example: A driver with a Dodge Pro Master City reported a 70% noise reduction simply by removing unused cross bars from the roof section.
Avoid Long Unbroken Spans
If you must keep cross bars in place, use shorter bars where possible. Consider angled or aerodynamic bars instead of flat ones. Space them to avoid creating large open zones that trap turbulence. Even small changes in bar placement can disrupt resonant frequencies and quiet the ride.
Position the Rack Correctly
How and where you install the ladder rack has a major impact on wind noise. A poorly positioned rack turns the overhang into a wind-blocking wall, while a well-placed one allows air to flow through the structure.
Align with Windshield Peak
Rack-it Inc. designs their overhangs based on cab type so that the front bar sits at a calculated distance forward of the windshield peak. This allows air to rise naturally and pass through the rack instead of hitting it head-on.
Installation tips:
– Ensure the front crossbar is forward enough that wind rolls up and over, not down onto the roof
– Avoid mounting the rack too far back, which creates a wall effect
– Use manufacturer-recommended positioning for your vehicle model
When installed correctly, the rack becomes part of the airflow path rather than an obstacle, resulting in a silent ride even at freeway speeds.
Upgrade with a Commercial Deflector Kit
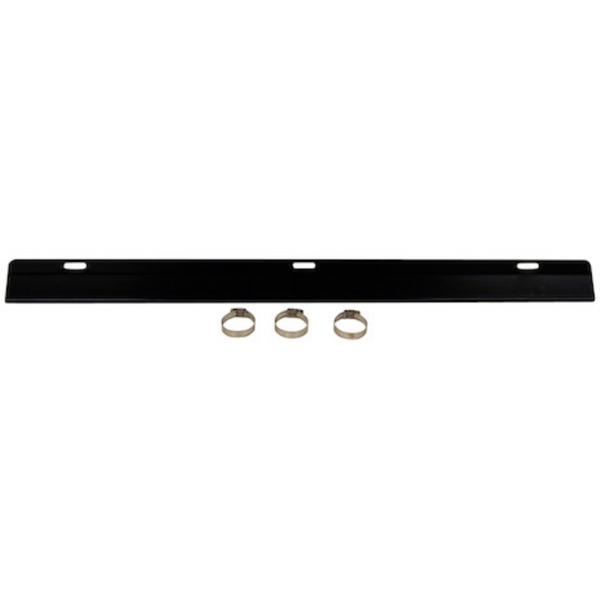
For those who want OEM-level performance and durability, a commercial wind deflector kit offers a polished, engineered solution.
Try the Buyers Products Wind Deflector Kit
Buyers Products, a U.S. manufacturer with over 75 years of experience, offers a ladder rack wind deflector kit designed to reduce noise and improve aerodynamics.
What you get:
– Aerodynamically shaped deflector panel
– Mounting hardware
– Durable construction built for heavy-duty use
– Made in the USA
While exact dimensions and adjustability are not specified, Buyers Products is known for reliable, no-nonsense truck equipment. Their philosophy focuses on real-world performance.
Ideal for:
– Fleet vehicles
– Contractors who drive long distances
– Anyone who wants a factory-grade fix
Pair this with proper rack positioning for maximum noise reduction.
Address Vehicle-Specific Noise Issues
Certain vehicles are more prone to ladder rack wind noise due to their aerodynamics. Understanding your vehicle’s specific challenges helps you apply the right fix.
Ford Escape Owners
Even though the Ford Escape does not have a traditional ladder rack, roof-mounted carriers can cause similar vortex shedding. Noise typically starts at 60 mph. The rope wrap method works just as well on vertical supports or side rails.
Dodge Pro Master City Owners
This compact van has a boxy roofline, making it prone to turbulence. Use a wind deflector or rope wrap on any rear-facing verticals. Removing unnecessary cross bars can also make a big difference.
Frequently Asked Questions About Ladder Rack Wind Noise
Why does my ladder rack only make noise at certain speeds?
Wind noise from ladder racks typically begins around 60 mph because that is when airflow velocity becomes high enough to create consistent vortex shedding. In headwind conditions, the effect can start as low as 15 to 50 mph due to increased relative airflow velocity.
Is the rope wrap method permanent or temporary?
The rope wrap method is both permanent and reversible. The nylon rope is UV-resistant and weatherproof, lasting for years. However, you can easily remove it if you want to return the rack to its original state.
Will a wind deflector work on any ladder rack?
Most clamp-on wind deflectors are designed to fit specific rack models. The Rack-it clamp-on deflector fits all Rack-it 38-inch truck racks. For other brands, check manufacturer specifications to ensure compatibility.
Can I combine multiple solutions for better results?
Yes. Many drivers find that combining methods delivers the best results. For example, using a rope wrap alongside proper rack positioning and a wind deflector can eliminate noise completely. Test one fix at a time to identify what works best for your specific setup.
Does rack positioning really make that much difference?
Yes. Proper rack positioning is one of the most effective solutions. When the front bar sits forward of the windshield peak, air flows over the rack naturally. When mounted too far back, the rack becomes a wall that blocks airflow and creates turbulence.
How much does it cost to fix ladder rack wind noise?
Costs range from under $10 for the rope wrap method to $80 to $120 for commercial deflector kits. Most drivers find that the under-$10 rope solution works effectively, making this one of the most affordable vehicle modifications you can make.
Key Takeaways for Eliminating Ladder Rack Wind Noise
Ladder rack wind noise is not an unavoidable nuisance. It is a solvable engineering problem rooted in fluid dynamics. The most effective strategies involve either disrupting vortex formation with the rope wrap method, redirecting airflow with wind deflectors, or optimizing rack geometry and placement.
Start with the rope method. It is inexpensive, reversible, and highly effective for most vehicles. If noise persists or aesthetics are a concern, install a clamp-on wind deflector. Use removable cross bars strategically, only installing them where needed for load support. Finally, verify rack positioning during installation to ensure optimal aerodynamic integration with your vehicle.
By combining practical fixes with sound aerodynamic principles, you can achieve a silent, smooth ride even with a full-sized ladder rack installed. Take action today. Start with the rope wrap. It is fast, cheap, and surprisingly effective. If you need something more refined, upgrade to a clamp-on deflector. Either way, you will eliminate the drone and reclaim your drive.


