
You’ve decided to remove a floating shelf, whether you’re redecorating, repairing the wall, or moving to a new home. These sleek, modern shelves look weightless, but they’re anchored with hidden brackets, screws, or cleats that require careful disassembly. Rushing the process risks damaging your wall, dropping the shelf, or losing small hardware.
The key to a clean removal lies in understanding how your specific shelf is mounted. Most floating shelves use concealed brackets secured into wall studs, and many especially IKEA models rely on small locking screws hidden beneath the front edge. Others use French cleats, Z-clips, or adhesive. Knowing what you’re dealing with makes all the difference.
Locate Hidden Mounting Screws
Check Under the Front Edge
Most floating shelves, especially IKEA models like EKBY or LACK, secure with small screws per end located on the underside of the front edge. These screws thread upward into a hidden wall bracket and are often the only thing preventing the shelf from sliding forward.
Use a flashlight to scan the bottom front of the shelf. Look for tiny Phillips-head screws, often recessed slightly. They may be covered with a wood plug or finish-matched cap. Check for a hairline seam. If you see a small dimple or discoloration, gently scratch it with a utility knife to expose the screw.
Pro Tip: Use a magnetic screwdriver or bit to prevent dropping screws into the wall cavity during removal.
Inspect the Top Rear Seam
If no screws are visible underneath, check the top rear edge where the shelf meets the wall. Some custom or European-style shelves use cam locks or dowels accessed from above. You may need to lift the front slightly to access these fasteners.
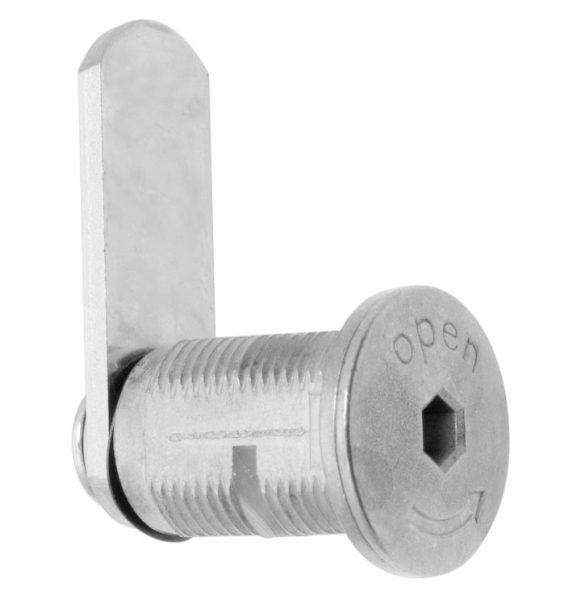
Shine a flashlight at a low angle across the seam. This highlights screw heads, plugged holes, or gaps in the finish. If you spot a small hole with a hex-shaped insert, it’s likely a cam lock requiring an Allen key to release.
Use a Stud Finder With AC Detection
Before prying or drilling, scan the area with a stud finder that detects live wires. You don’t want to damage electrical lines hidden behind the wall, especially if the shelf is near outlets or switches.
Mark stud locations and any AC warnings. Brackets are almost always anchored into studs, so knowing their position helps you anticipate screw locations and avoid hazardous areas.
Remove Locking Screws Safely
Loosen First, Remove Later
Once you’ve located the screws, use a Phillips #2 screwdriver or drill with a magnetic bit to turn them counter-clockwise. However, do not fully remove them unless necessary.
In systems like IKEA’s, these screws act as retention pins, not weight-bearing fasteners. Loosen each by a quarter to half turn, just enough to disengage the shelf from the bracket rail. Fully removing them risks losing them inside the wall or damaging soft particleboard.
Warning: Over-tightening during reinstallation can strip the screw holes. These shelves are meant to be disassembled, so handle hardware gently.
Handle Stripped or Stubborn Screws
If a screw head is stripped, place a wide rubber band between the screw and driver bit for extra grip. Press down firmly while turning slowly.
For completely damaged screws, use a screw extractor kit. Drill a small pilot hole, then insert the extractor to back the screw out. If the screw breaks off, remove the shelf first, then tackle the leftover hardware after.
User Tip: A dentist’s mirror helps view tight spaces under the shelf without straining your neck.
Detach the Shelf From the Bracket
Slide Straight Forward
After loosening the screws, support the full weight of the shelf with both hands. Then, pull it straight forward horizontally, no lifting or tilting.
Most hidden bracket systems like IKEA’s rod-and-rail design allow the shelf to slide off the wall-mounted pins. If it resists, stop. There may be adhesive or an undetected fastener causing the resistance.
Lift Slightly for French Cleats
If your shelf uses a French cleat, it won’t slide forward. Instead, it hangs on a 45-degree beveled strip anchored to the wall. After removing any retaining screws, lift the shelf upward about an inch to disengage the interlocking cleats.
This motion requires clearance above the shelf. If it’s near the ceiling, tilt the front down slightly while lifting the back.
Unhook Z-Clips or Rear Hooks
Z-clips and similar hidden brackets allow the shelf to hook onto a wall plate. Once screws are out, pull the shelf forward and slightly down to unhook the rear lip from the upper clip.
Feel for resistance. If it’s firm, double-check for adhesive or extra screws on the sides or back corners.
Break Adhesive Seals Without Damage

Test for Caulk or Construction Adhesive
Even if screws are removed, the shelf may resist movement. This often means construction adhesive, silicone caulk, or wood glue was applied along the back or top edge for stability.
Gently insert a flexible putty knife or plastic scraper between the shelf and wall at one end. If it doesn’t slide in easily, adhesive is likely present.
Apply Heat to Soften the Bond
Use a hair dryer on low heat or a heat gun set below 300 degrees Fahrenheit to warm the seam for 30 to 60 seconds. This softens most adhesives, making separation easier.
Work slowly with the putty knife, progressing from one end to the other. Avoid metal pry bars. They can gouge drywall or pop out chunks.
Risk Alert: Forcing the shelf can tear the paper face of drywall, leading to larger repairs. Heat and patience are your best tools.
Remove Wall Bracket and Anchors
Unscrew the Hidden Bracket
Once the shelf is off, the metal or wooden bracket will be exposed. It’s typically secured with 2 to 4 screws driven into wall studs.
Remove all screws using a drill or screwdriver. If the bracket doesn’t come free, it may be painted over. This is called a paint lock. Score around the edges with a utility knife to break the seal.
Extract Damaged or Embedded Anchors
If you encounter leftover anchors, use the right technique for each type.
For plastic anchors, grab with pliers and pull straight out. For toggle bolts, compress wings with needle-nose pliers or cut the bolt flush with a Dremel. For molly bolts, either push them into the wall cavity or drill out the center screw and collapse the sleeve.
Safety Note: Never leave metal brackets or sharp anchor ends embedded. They can be hazardous during future wall work.
Patch and Repair the Wall
Fill Screw Holes and Anchor Cavities
Small screw holes can be filled with spackle or lightweight joint compound using a 1.5-inch putty knife. For larger anchor holes, follow these steps.
Press a self-adhesive mesh patch over the cavity. Apply joint compound in thin layers, feathering edges outward. Let dry 2 to 4 hours between coats, following product instructions.
Pro Tip: Feathering prevents ridges and ensures a smooth finish when repainting.
Sand and Prime for a Seamless Finish
Once dry, sand the patch with 120-grit, then 220-grit sandpaper until flush with the wall. Wipe away dust with a damp cloth.
Apply oil- or water-based primer over the patch. This prevents flashing, which is a visible difference in paint sheen or color after repainting.
Expert Advice: Always prime patches. Skipping this step often leads to hours of touch-up frustration.
Repaint the Area
Use touch-up paint that matches your wall. If you don’t have leftover paint, bring a sample chip to a hardware store for a precise match.
Paint a slightly larger area than the patch to blend it into the surrounding wall. Match the finish, whether matte, eggshell, or satin, for best results.
Handle Brand-Specific Systems
Remove IKEA EKBY or LACK Shelves
IKEA floating shelves use a hidden rail system with vertical metal rods anchored into studs. The shelf slides over the rods and is secured by two small screws per end under the front edge.
Loosen screws a half turn. Support the shelf and slide straight forward. The bracket remains on the wall. Remove screws to take it down.
Bonus: The entire system is reusable. Keep hardware for reinstallation.
Take Down French Cleat Shelves
These use a 45-degree wooden strip mounted on the wall, with a matching cleat on the shelf back.
Remove any front screws. Lift the shelf upward to disengage the cleat. Unscrew and remove both wall and shelf cleats.
Note: Cleats leave large holes. Patching may require mesh and multiple compound coats.
Disassemble Cam Lock or Dowel Systems
Common in modern minimalist shelves, these use hidden connectors accessed through small holes.
Remove plastic or wood caps with a knife. Insert hex key or cam key and turn 90 degrees to unlock. Pull shelf forward.
Troubleshooting: If the shelf won’t release, ensure the cam is fully rotated. Some require counter-clockwise turns to disengage.
Avoid Common Removal Mistakes
Don’t Skip Safety Gear
Always wear safety goggles and work gloves. Debris, drywall dust, or sharp bracket edges can cause injury. Use a stable ladder on level ground. Never stand on chairs or boxes.
Fact: Twenty percent of DIY wall fixture injuries involve ladder falls.
Don’t Force a Stuck Shelf
If the shelf won’t budge after screw removal, stop and recheck. You likely missed a fastener or adhesive bond. Forcing it risks wall damage or injury.
Use a flashlight, mirror, or stud finder to inspect thoroughly before proceeding.
Don’t Lose Small Hardware
Place screws and clips in a magnetic tray or labeled bag immediately. Losing a single screw can complicate reinstallation or proper hole filling.
Pro Move: Take a photo of the bracket and screw layout before disassembly.
Repair and Reuse After Removal
Save Hardware for Reinstallation
Floating shelf systems are designed for disassembly. If the shelf and bracket are in good condition, save all parts for reuse.
Label components if storing long-term. Replace worn screws with fresh ones to ensure a secure re-mount.
Donate or Resell Functional Units
Working IKEA or high-end shelves can be resold on Facebook Marketplace, Craigslist, or OfferUp. Include all hardware. This increases value and appeal.
Thrift stores may accept them if clean and undamaged.
Dispose of Engineered Wood Responsibly
Particleboard and MDF shelves cannot be recycled in most curbside programs. Check with your local waste authority. Many require disposal as bulk trash.
Warning: Do not burn MDF or particleboard. They contain formaldehyde resins that release toxic fumes when incinerated.
Frequently Asked Questions About Taking Down a Floating Shelf
How do I find hidden screws on a floating shelf?
Most hidden screws are located on the underside of the front edge, especially on IKEA models. Use a flashlight to scan this area carefully. Look for small dimples, discoloration, or hairline seams that might indicate a covered screw. If nothing is visible there, check the top rear edge where the shelf meets the wall.
Can I remove a floating shelf without damaging the wall?
Yes, you can remove a floating shelf without damaging the wall by following the proper procedure. Locate all hidden screws first, then loosen them instead of removing completely. Support the shelf’s weight while sliding it forward. If adhesive is present, apply heat to soften it before prying. Patching is minimal if done correctly.
What tools do I need to take down a floating shelf?
You need a Phillips screwdriver or drill with magnetic bit, flashlight, putty knife, safety goggles, and work gloves. A stud finder helps locate studs and detect live wires. For wall repair afterward, have spackle, mesh patches, sandpaper, primer, and touch-up paint ready.
How do I remove a stripped screw from a floating shelf?
Place a wide rubber band between the stripped screw head and your screwdriver bit for extra grip. Press down firmly and turn slowly. If that fails, use a screw extractor kit. Drill a small pilot hole first, then insert the extractor to back the screw out.
How do I fix wall holes after removing a floating shelf?
Fill small screw holes with spackle using a putty knife. For larger anchor holes, apply a self-adhesive mesh patch first, then cover with joint compound in thin layers. Let each coat dry for 2 to 4 hours. Sand smooth, apply primer, then repaint the area.
Can I reuse a floating shelf after removing it?
Yes, floating shelves and their bracket systems are designed for disassembly and reuse. Save all hardware including screws, brackets, and mounting rails. If reinstalling, verify stud locations match your new spot and replace any worn screws.
Key Takeaways for Taking Down a Floating Shelf
Removing a floating shelf is a quick job when done right, often taking just 2 to 5 minutes for IKEA models. The secret isn’t strength, it’s knowing where the hidden screws are and understanding how the bracket system works. Always locate all fasteners before attempting removal, and never force a stuck shelf.
With the right tools, a little patience, and this guide, you can take down any floating shelf cleanly, safely, and without wall damage. Patch the holes immediately after removal to prevent dust accumulation and moisture ingress. Save all hardware if you plan to reinstall the shelf elsewhere.
The most common mistakes include skipping safety gear, forcing a stuck shelf, and losing small hardware. Avoid these by working slowly, using a magnetic tray for screws, and wearing goggles and gloves throughout the process. Your walls will stay intact, and you’ll have everything you need for your next project.


