

Drilling a shelf correctly is essential for a secure, level, and long-lasting installation. Whether you are mounting floating shelves, adjustable cabinets, or traditional bracket-supported units, knowing How to Drill Shelf holes with proper technique and alignment makes all the difference. With the right approach, even DIYers can achieve professional-grade results. This guide walks you through every critical step, from selecting the correct drill bit to aligning holes perfectly.
Choose the Right Shelf Type
Selecting the appropriate shelf type determines your drilling approach and hardware requirements. Each shelf style demands specific hole configurations and mounting methods.
Floating Shelves
Floating shelves feature hidden brackets or rods anchored into the wall, with the shelf sliding over protruding metal supports. These require deep, straight ½-inch holes drilled 6 to 8 inches into the back edge of the shelf. Perfect alignment is critical because even 1/16-inch misalignment causes the shelf to rock. These shelves work best for clean, modern aesthetics in living rooms or bathrooms.
Adjustable Shelves
Adjustable shelves use ¼-inch shelf pins inserted into vertical hole columns on cabinet sides. Holes are typically spaced 1 inch or ¾ inch on center and must be drilled to a consistent ⅜-inch depth. The drilling must be perfectly perpendicular to ensure pins seat properly. This configuration is ideal for bookcases, cabinets, and kitchen storage units.
Bracket-Mounted Shelves
Bracket-mounted shelves rest on visible L-brackets or decorative supports. These mount directly into wall studs or use drywall anchors for lighter loads. This option is the easiest for beginners and allows quick height adjustments. Bracket-mounted shelves are suitable for heavy storage when anchored properly into structural framing.
Gather Essential Tools and Materials
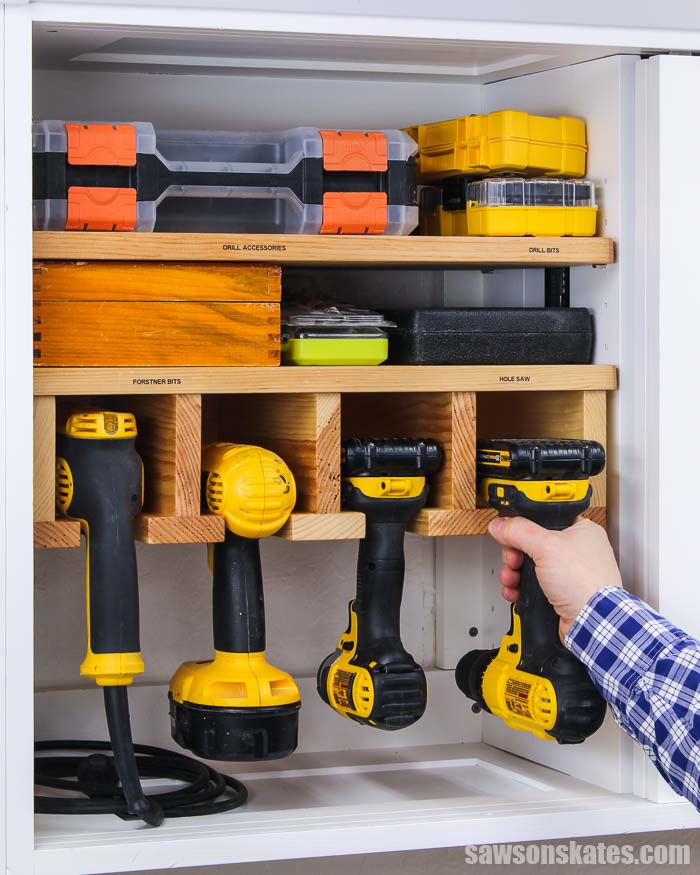
Having the right tools ensures precision and reduces the risk of mistakes during drilling.
Core Tools You Will Need
A cordless or corded drill serves as your primary tool. A corded drill is preferred for deep floating shelf holes where consistent torque matters. You also need a spirit level to ensure horizontal alignment, a tape measure and pencil for marking positions, a stud finder for locating wall framing, clamps to secure jigs and guides during drilling, and a square tool to prevent drilling drift.
Specialty Tools for Precision
A doweling jig guides the bit for straight, repeatable holes and is essential for floating shelf installations. A floating shelf drill guide, available for about $19, ensures perfect alignment for bracket holes. For adjustable shelves, a perforated steel strap provides a durable, reusable jig with 5/16-inch holes spaced every ¾ inch on center. A plunge router with a guide bushing serves as a high-accuracy alternative for shelf pin holes.
Drill Bits by Application
The correct drill bit depends on your specific application. For floating shelf bracket holes, use a ½-inch spade or auger bit with a long shank capable of drilling beyond 6 inches. Shelf pin holes require a ¼-inch brad-point or self-centering bit. Drywall anchors need a twist bit matching the anchor size. Masonry walls demand a hammer-rated masonry bit.
Mark and Measure with Precision
Accurate marking prevents costly alignment errors that are difficult to correct after drilling.
Determine Shelf Height
Standard top shelf height measures 54 inches from the floor. For a ¾-inch thick shelf, mark the bottom edge at 53¼ inches. Use a level to draw a continuous reference line across the wall at your chosen height. This line serves as your guide for all bracket placements.
Locate Studs in Drywall
Use a stud finder to identify wall framing behind drywall. Standard stud spacing is 16 or 24 inches on center. Mark each stud center clearly with a pencil. Always anchor brackets to studs when possible because drywall alone cannot support heavy loads.
Plan Bracket Placement
For a 48½-inch shelf, place outer brackets at the ends, aligned with studs when available. Position a center bracket at 24¼ inches from each end. Use the shelf itself as a guide to center the level and mark bracket positions. Ensure equal overhang on both sides, such as 6 inches per side on a 60-inch wall.
Drill Accurate Holes for Each Shelf Type
Precision drilling techniques differ significantly between shelf types. Understanding these differences prevents alignment problems.
Floating Shelf Bracket Holes
Misaligned holes prevent the shelf from seating flush, cause stress cracks, and create instability. To drill accurately, mark hole centers on the back edge of the shelf and clamp the shelf securely to prevent movement. Use a doweling jig or commercial drill guide to ensure straightness. Drill ½-inch holes deeper than the bracket length, adding at least ⅛ inch extra for tolerance. Rock the bit slightly at entry to widen the hole slightly, which eases bracket insertion. Repeat for all holes.
Without a jig, drill three pilot holes first and use a square to correct drift before final drilling. This technique improves accuracy significantly when a guide is unavailable.
Adjustable Shelf Pin Holes
Four reliable methods exist for drilling adjustable shelf pin holes. The pegboard jig method uses scrap pegboard cut to cabinet side height with ¼-inch diameter holes spaced 1 inch on center. Label the jig “TOP,” “FRONT,” and “BACK” to prevent orientation errors. Clamp to the workpiece and drill through, flipping the jig when switching sides to maintain edge distance.
The perforated steel strap method uses a durable metal strip with 5/16-inch holes every ¾ inch on center. Use with a self-centering bit that has a tapered nose which centers automatically. Clamp in place and cover unused holes with masking tape.
The custom hardboard guide method uses ¼-inch hardboard with ⅜-inch centering holes spaced 1 inch on center. Maintain 1¼-inch edge clearance and use a ¼-inch self-centering bit with a step nose.
The plunge router method uses a ¼-inch straight bit with a 3/8-inch outside diameter guide bushing. Set depth to ⅜ inch plus ¼ inch jig thickness, totaling 5/8 inch.
Install Brackets Based on Wall Type
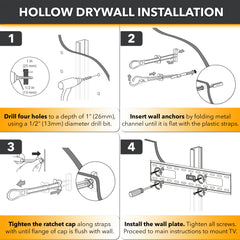
Wall composition determines your anchoring strategy and hardware selection.
Drywall Walls
For outer brackets aligned with studs, hold the bracket against the wall and align with stud marks. Drill a pilot hole first to prevent drywall cracking, then secure with 1½-inch sheetrock screws. Ensure at least 1 inch of thread engages the stud.
For center brackets where no stud exists, use a heavy-duty drywall anchor. Tap the anchor in by hand, do not use a drill, because this risks breakage. Attach the bracket with a screw and tighten fully. If a stud is available at the center position, always use it instead of an anchor.
Masonry, Brick, or Concrete
Hold the bracket in place and use a spirit level for alignment. Mark hole positions and tap a small indentation to guide the bit. Set the drill to hammer mode and use a masonry bit matching your anchor size. Drill the hole and insert a plastic raw plug, tapping gently with a hammer if needed.
Align the bracket over the plug, insert the screw, and tighten. Confirm the bracket is firm and does not wobble before mounting the shelf.
Floating Shelves on Studs
For heavy-duty floating shelves, locate studs with a stud finder and trace the bracket outline on the drywall. Cut out the section so the bracket plate sits flush against the stud. Secure with 2-inch or longer screws because shorter screws risk pull-out under load.
Custom steel brackets made from ½-inch round stock welded to ¼-inch steel plate support over 200 pounds and cost approximately $20 to $25 per set. These are ideal for TV mounts, bathroom vanities, and similar heavy applications.
Mount and Secure the Shelf
The final mounting step ensures your shelf sits level and secure.
Floating Shelves
Slide the shelf onto the brackets. No glue or caulk is needed because friction holds it securely. If the fit is tight, tap gently with a rubber mallet. Upgraded brackets eliminate wobble and provide long-term stability.
Bracket-Mounted Shelves
Place the shelf on the brackets and use a level on top. Adjust until the bubble is centered. Mark screw holes on the shelf underside, drill pilot holes to prevent splitting, and secure with 1-inch screws. This length prevents drilling through a ¾-inch shelf.
Ensure equal overhang by measuring from the wall to the shelf end on both sides. Adjust until the overhang is identical.
Avoid Common Drilling Mistakes
Understanding common errors helps you prevent them before they cause problems.
Misaligned holes result from freehand drilling without a jig. Using a commercial drill guide or pegboard jig reduces error to less than 1/32 inch. Over-drilling occurs when the bit exits the back of the shelf or wall. Use a wooden depth stop block rather than tape for reliable depth control.
Drywall cracking happens when you skip pilot holes or overtighten screws. Always drill pilot holes and use coarse-thread screws. Anchor failure occurs because drywall anchors typically fail at 20 to 50 pounds. Use toggle bolts for heavy loads supporting over 100 pounds.
Never drill near outlets or switches because of the risk of hitting hidden electrical wires. Use a stud finder with AC detection if you are unsure about wall contents.
Test and Maintain Your Shelf
Regular inspection ensures long-term stability and safety.
Load Testing
Stud-mounted brackets hold over 200 pounds with no loosening after five or more years. Drywall anchors may loosen within 6 to 12 months due to compression. Always respect manufacturer load ratings for anchors and brackets.
Annual Inspection
Check for loose screws, wobbly brackets, and cracked drywall or anchor pull-out. Tighten or replace components as needed. For adjustable shelves, check pin stability every one to two years and replace damaged holes with dowels and re-drill at corrected locations.
Pro Tips for Long-Term Success
Label all jigs with “TOP,” “FRONT,” and “BACK” to prevent orientation errors. Flip the jig when switching sides to maintain consistent edge distance. Cover unused holes with tape to avoid accidental drilling.
Distribute weight evenly across the shelf and avoid overloading the center without central support. Work with a partner for easier leveling and alignment. Bold the top side of the shelf before drilling to prevent upside-down installation.
Frequently Asked Questions About Drilling a Shelf
What is the best drill bit for floating shelf holes?
A ½-inch spade or auger bit with a long shank is best for floating shelf holes. The bit must be long enough to drill deeper than 6 inches, and you should add approximately ⅛ inch extra depth beyond the bracket length.
How do I prevent my shelf from wobbling after installation?
Ensure brackets are anchored into wall studs rather than drywall alone. Use a level during installation and verify equal overhang on both sides. Upgraded custom brackets eliminate wobble and increase load capacity significantly.
Can I drill shelf pin holes without a drill press?
Yes, you can use jigs such as a pegboard jig, perforated steel strap, or custom hardboard guide. These jigs guide the drill bit for straight, repeatable holes and work with any portable drill.
How do I find studs behind drywall?
Use a stud finder or perform a knock test. Studs are typically spaced 16 or 24 inches on center. Mark stud centers clearly with a pencil before mounting brackets.
What happens if I drill into electrical wires?
Never drill near outlets, switches, or where wiring may run. Use a stud finder with AC detection if you are uncertain. Hitting wires can cause serious injury or fire and requires professional assessment immediately.
Key Takeaways for Drilling Your Shelf
Drilling a shelf successfully requires matching your technique to your shelf type and wall composition. Floating shelves demand deep, perfectly aligned ½-inch holes, while adjustable shelves need consistent ¼-inch pin holes spaced precisely on center. Always anchor to wall studs whenever possible because drywall anchors cannot support heavy loads.
Use jigs and guides to eliminate alignment errors. A doweling jig or commercial drill guide ensures straight holes, while a perforated steel strap or pegboard jig provides consistent shelf pin spacing. Label all jigs and work with a partner for better accuracy.
Invest in quality brackets and hardware. Custom steel brackets supporting over 200 pounds are worthwhile for heavy-duty applications. Test your installation by checking for wobble, verifying levelness, and confirming secure anchor engagement before loading the shelf.


