
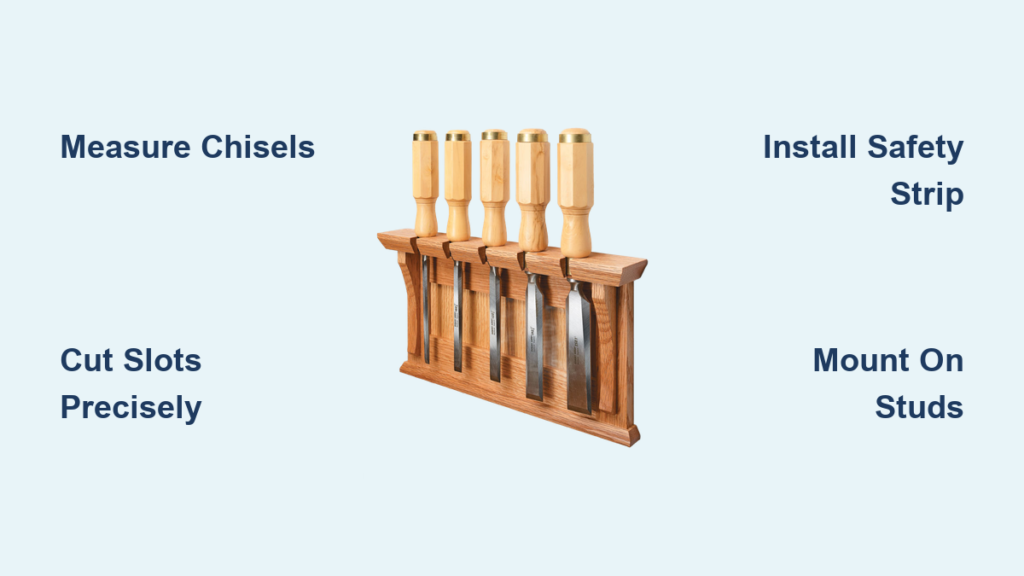
If your chisels are buried in a drawer or stacked haphazardly on the bench, you’re not just wasting time—you’re risking damage to precision edges and inviting injury. A custom chisel rack keeps your tools organized, protected, and instantly accessible. Whether you’re a hobbyist or a professional woodworker, learning how to make a chisel rack is a simple, high-impact project that enhances safety, preserves tool life, and brings pride to your workshop. This guide walks you through every step—from measuring your chisels to final mounting—using proven designs that prioritize stability, visibility, and edge protection.
Choose the Right Chisel Rack Design for Your Skill Level
Compare the Three Main Build Methods
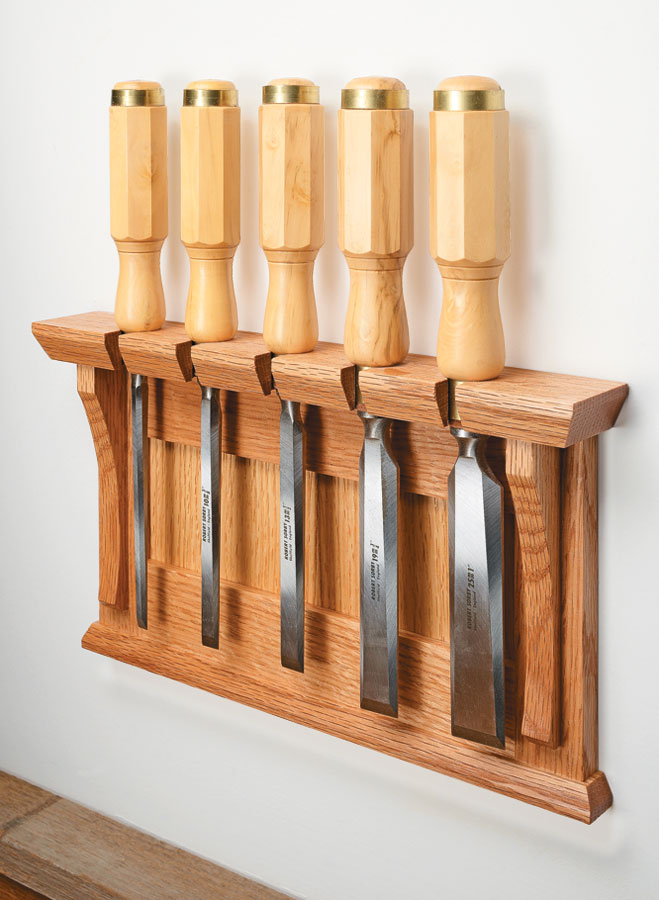
Three effective chisel rack designs emerge from tested approaches: mortise-style, sandwich rack, and hybrid pocket. Each has distinct advantages. The mortise-style uses hand-cut slots for a clean, custom fit and showcases craftsmanship. The sandwich rack uses front and back panels with spacers, making it beginner-friendly and fully expandable. The hybrid pocket method combines Forstner bits and band saw cuts for precision and tip protection. Your choice depends on skill level, tools available, and how often you plan to modify the rack.
Pick a Design That Matches Your Experience
Beginners should start with the screw-only sandwich rack. It requires only basic tools and takes under an hour. No joinery or gluing is needed. Intermediate builders can tackle the mortise or hybrid methods, which improve fit and aesthetics but demand greater precision. All methods keep chisel tips safely shielded when mounted correctly. Choose based on your confidence with measuring, drilling, and sawing straight lines.
Select Materials and Cut Your Stock
Choose Stable, Durable Wood
Choose 3/4 inch solid wood like birch, poplar, or oak for durability and ease of finishing. Scrap wood, such as half of a 2×4 or baseboard offcuts, works for budget builds. Half-inch plywood is ideal for precise slot cutting and resists warping. Just seal the edges to prevent moisture damage. Avoid MDF in humid environments. It swells and lacks screw-holding strength. Cut your main panel to at least 14 inches long by 5.5 inches tall to hold six standard chisels, or longer if you plan to expand your collection.
Prepare Spacer Blocks for Sandwich Racks
For sandwich-style racks, cut one-inch-long spacer blocks from three-quarter-inch stock, same thickness as your panels. You will need one spacer every 12 inches along the rack’s length, plus end caps. These spacers create vertical slots that hold chisels securely without glue. Label front and back panels to avoid confusion during assembly. Sand all pieces smooth before layout to ensure accurate marking.
Measure and Mark Chisel Locations Precisely
Record Key Chisel Dimensions
Use calipers to measure each chisel’s socket diameter, which is the widest part near the handle, and ferrule diameter, which is the metal collar. Note blade thickness as well, since this determines minimum slot width. Group chisels by size and lay them on the board to visualize spacing. Trace handles or mark centerlines to plan placement. This prevents rotation and keeps size labels visible.
Space Slots Evenly Across the Rack
Set chisels with one to two inches between centers, adjusting slightly for handle width. Use a marking gauge to scribe parallel centerlines across the board. Lock spacing into your calipers or a story stick for consistency. Position the first and last chisels at least one inch from the edges for structural strength. Mark all slot locations clearly before cutting.
Cut Precision Slots or Pockets for Your Chisels
Drill Hybrid Pockets Using Forstner Bits and Band Saw
For maximum tip protection, drill two concentric holes per chisel. First, use a Forstner bit slightly larger than the ferrule to drill a half-depth hole. Then, use a larger bit matching socket diameter to drill a full-thickness hole. Trace a vertical slot connecting both holes. Cut it with a band saw or coping saw. Use a round file to clear the back wall so the socket passes through while the blade lies flat against the board.
Cut Mortise-Style Housings by Hand
For a traditional look, cut rectangular mortises by hand. Saw clean shoulders with a backsaw, cutting just outside your layout lines. Clamp the board securely. Pare out waste with bench chisels, working incrementally from both sides. Keep the blade lubricated with oil to reduce friction. Test-fit each chisel. Slots should be snug but allow one-handed insertion. Widen with a chisel or file if needed.
Build a Simple Sandwich Rack
Cut two identical front and back strips, such as 44 inches long by 2 and three-eighths inches tall. Position spacer blocks every 12 inches along the back panel. Drill clearance holes through the front panel every 12 inches, half an inch from each end. Countersink the holes. Mount the back panel to the wall first. Align the front panel over the spacers, drill pilot holes through spacers into the back panel, and drive screws. No glue is needed. This design is fully disassemblable.
Assemble Your Chisel Rack for Strength and Safety

Choose Between Glue or Screw Assembly
Glue all joints in mortise-style builds, including the bottom safety strip. Clamp firmly and let cure 24 hours. For modular racks, use screws only. This allows future adjustments. Drive screws through front panel, spacer, back panel, and wall stud. Use short pin nails for lightweight builds, angling them in opposite directions for grip. Avoid nails longer than total thickness to prevent protrusion through the back.
Install the Bottom Safety Strip
Cut a strip long enough to span the base and tall enough to block access to chisel tips. Height depends on your longest chisel, typically 1.5 to 2 inches. Attach it after the main housing is complete. This strip prevents hands from sliding down and contacting sharp edges. It is a critical safety feature, especially in shared workshops.
Mount the Rack Securely to Your Wall
Attach to Wall Studs for Maximum Support
Mount the rack at eye or chest level for visibility and safety. Use a pencil line to mark a level installation guide. Drill pilot holes through the back panel only, placing them between chisel slots to avoid weakening the structure. Secure to wall studs with two to three screws for heavy racks. If no studs align, use toggle bolts or heavy-duty drywall anchors rated for 50 pounds or more.
Follow the Proper Mounting Sequence
In screw-based designs, mount the back panel first. Then add spacers, align the front panel, and attach it through the spacers. This ensures the rack remains flat and stable. Check alignment with a level before driving final screws. Keep the rack clear of bench overhang so tools stay accessible when the bench is pushed in.
Customize and Expand Your Storage
Add Multi-Tool Storage to Your Rack
The same rack design can hold gouges, screwdrivers, rasps, or layout tools. Widen slots for bulkier handles. Add hooks or nails to the front for hanging mallets or clamps. Install a small shelf above for sharpening stones or marking tools. A magnetic strip on the side holds steel accessories like chisel guides or screw bits.
Plan for Future Chisel Expansion
Build the rack longer than your current needs. Leave space between slots or extend the board by six to 12 inches. In modular designs, simply add more spacers and reattach the front panel. You can also cut a new front panel to fit a growing collection. This adaptability makes DIY racks superior to fixed commercial models.
Finish and Maintain Your Chisel Rack
Apply Protective Finish
Smooth all surfaces with 180 to 220 grit sandpaper. Apply tung oil, linseed oil, or paste wax for a natural look that enhances grain. For durability, use polyurethane, especially on plywood edges. Paint MDF versions for a modern aesthetic. Let finish cure fully before mounting. Reapply every six to 12 months to protect against workshop dust and moisture.
Perform Annual Maintenance
Wipe the rack monthly with a dry cloth. Inspect for loose screws, especially in humid environments. Tighten as needed. Check for warping or splitting in solid wood versions. Replace damaged spacers or panels promptly. A well-maintained rack lasts 10 years or more and continues to protect your investment in quality tools.
Frequently Asked Questions About Making a Chisel Rack
What is the easiest chisel rack design for beginners?
The screw-only sandwich rack is the easiest design for beginners. It requires only basic tools like a saw, drill, and screws. No joinery or gluing is needed, and the entire build takes under an hour. The design is also fully disassemblable, allowing easy modifications later.
How much space do I need between chisels on the rack?
Space chisels with one to two inches between centers, depending on handle width. Use a marking gauge to ensure parallel spacing across the entire rack. Position the first and last chisels at least one inch from the edges to maintain structural integrity.
Which wood is best for a chisel rack?
Three-quarter-inch solid wood like birch, poplar, or oak works best for durability and finishing. Half-inch plywood is excellent for precise slot cutting and resists warping. Avoid MDF in humid environments since it swells and does not hold screws well.
How do I protect chisel tips in the rack?
Position chisels close to the back wall and install a bottom safety strip that blocks access to sharp tips. The strip should be 1.5 to 2 inches tall, depending on your longest chisel. This prevents hands from sliding down and contacting blade edges during normal use.
Can I expand my chisel rack later?
Yes. Build the rack longer than your current needs and leave extra space between slots. In sandwich-style racks, simply add more spacers and reattach the front panel. Modular screw-based designs allow complete reconfiguration without rebuilding.
Key Takeaways for Building Your Own Chisel Rack
A chisel rack is not just storage. It is a statement of craftsmanship that protects your investment in quality tools. Start with the sandwich rack design if you are a beginner, as it requires only basic tools and can be completed in under an hour. Choose the mortise-style build if you want to showcase your woodworking skills and achieve a custom fit. Regardless of design, always install the bottom safety strip to prevent accidental contact with sharp edges. Mount the rack at eye or chest level to wall studs for stability and easy access. Build longer than your current needs to accommodate future tool purchases. Whether you spend an hour on a simple sandwich rack or two hours on a hand-fitted mortise build, you gain organization, safety, and pride in a workshop perfectly tailored to your needs.


