
You’re staring at a deep cabinet or cluttered bookshelf, tired of digging through items you can’t see. What if you could turn that static shelf into a smooth-gliding drawer without replacing the whole unit? Converting a shelf into a drawer is one of the most effective upgrades for reclaiming space and boosting accessibility in kitchens, closets, and built-ins. The good news: you don’t need to be a master carpenter. With the right tools, precise measurements, and a clear plan, you can transform any shelf into a functional pull-out drawer in a weekend.
This guide walks you through every step from measuring your cabinet opening and choosing materials to installing full-extension slides and aligning drawer fronts for a seamless finish. Whether you’re reusing the existing shelf as the drawer base or building a new box, you’ll learn pro techniques for clean assembly, perfect slide alignment, and professional-looking results.
Measure Cabinet Opening First
Before cutting wood or buying slides, measure your cabinet or shelf unit accurately. A precise fit ensures smooth operation and prevents frustrating adjustments later.
Width, Depth, and Height
Record three key dimensions. Measure the width between the inner faces of the cabinet walls or face frames at the front, middle, and back, using the narrowest measurement. Measure the depth from the front edge to the back wall, which determines slide length. Measure the height of available vertical space for the drawer, planning clearance if stacking multiple drawers.
For example, in a 28-inch wide opening, subtract 1 inch total (0.5 inch per side) for slide clearance, so your drawer box should be 27 inches wide.
Account for Clearance and Doors
Leave a 1/8-inch gap between stacked drawers and 1/4-inch to 1/2-inch front-to-back clearance to prevent binding. Ensure cabinet doors open at least 90 degrees or modify hinges to allow full drawer extension. Use the existing shelf as a spacer to check floor clearance when closed.
Reuse or Replace the Shelf
You can either repurpose the current shelf as the drawer bottom or build a new drawer box. Both methods work, and your choice depends on shelf condition, material, and load needs.
Reuse Existing Shelf as Drawer Bottom
If the shelf is solid and flat, carefully remove it, scoring edges with a utility knife if it’s veneered. Cut down the width by 1 inch (0.5 inch per side) to fit slides, supporting it on scrap wood when cutting with a circular saw to prevent splintering. Use painter’s tape along the cut line to reduce chipping.
If adding side panels on top of the shelf, no further reduction is needed. If attaching sides to the edges, subtract twice the board thickness (for example, minus 1.5 inches for two 3/4-inch boards).
Build a New Drawer Box
Cut from 1/2-inch or 3/4-inch plywood depending on load requirements. For depth sides inset method, the front and back length equals opening width minus 1 inch for slide clearance, and the side depth equals cabinet depth minus twice the panel thickness minus 0.25 inch clearance. For length sides inset method, the front and back length equals opening width minus 1 inch minus twice the panel thickness, and the side depth equals cabinet depth minus 0.25 inch clearance. Choose the method that maximizes strength and fits your depth.
Cut and Assemble the Drawer Box

A square, sturdy drawer box is essential for smooth sliding. Build it with precision and reinforce joints properly.
Cut All Components
From your chosen material, cut two side panels, one front, one back, and one bottom panel if building new. Double-check dimensions before cutting and use a miter or table saw for straight edges.
Route a Channel for the Bottom (Optional)
For a cleaner look and stronger joint, use a table saw or router to cut a 1/8-inch deep by 1/4-inch wide groove along the inner edges of front, back, and sides. Pass through the table saw twice with slight offset for a clean channel, then insert the bottom panel into the groove. This method hides the bottom edge and allows fastening from below.
Assemble the Box
Apply wood glue to joints and clamp pieces together. Secure with 1-1/4-inch 18g brad nails. Insert bottom panel and fasten with glue and nails. Check for squareness with a speed square and adjust if corners aren’t 90 degrees. Avoid over-clamping because wood can warp under pressure.
Apply Edge Banding for a Clean Finish
Raw plywood edges look unfinished. Edge banding gives your drawer a solid wood appearance.
Install Iron-On Edge Banding
Cut banding slightly longer than the edge and align and press into place. Run a hot iron over it (medium setting) to activate adhesive and let cool completely. Trim excess with a utility knife or razor. Sand lightly with 150 to 220 grit paper. Test on scrap first because too much heat can bubble the adhesive. Apply to all visible edges including front, sides, and top edges of the box.
Finish Before Assembly
Always finish components before installing slides or drawer fronts. It’s nearly impossible to reach all areas once installed.
Painted Finish (Match White Cabinets)
Sand surfaces with 120 grit and wipe clean. Apply primer (like KILZ 2) and lightly sand after drying. Apply two coats of paint (like Satin Furniture Paint) and sand lightly between coats. Use a brush for edges and roller for flat surfaces.
Stained Finish (Match Wood Cabinets)
Sand progressively from 80 to 150 to 220 grit. Apply wood conditioner and wait 30 minutes. Wipe on stain (like Special Walnut) and immediately wipe off excess. Let dry in a space maintained at minimum 30 degrees Fahrenheit indoors. Apply polyurethane in a space maintained at minimum 50 degrees Fahrenheit for curing. Allow full cure of 24 to 72 hours. Always test finish on a scrap piece first.
Install Drawer Slides in Cabinet
Proper slide installation ensures smooth, wobble-free movement. Level and alignment are critical.
Prepare Cabinet for Mounting
If your cabinet has a face frame that overhangs the interior by 3/8 inch, attach a 3/8-inch plywood spacer behind the slide mounting area. This brings the slide flush with the front. Use Loctite Construction Adhesive (no more than 1/16-inch layer) to secure spacers, which adds strength without interfering with slides.
Mark and Mount Slides
Decide drawer height (for example, 8 inches or 12 inches) and mark the centerline of pull location. Draw a level line across the cabinet and align slide so hardware matches this line. For heavy or deep drawers, center slides vertically for stability. For top-mounted pulls, place slides higher in the box to reduce leverage.
Secure Slides to Cabinet
Position slide on wall and drill pilot holes. Use countersink bit for flush screws. Drive 2-inch screws into studs or solid backing and 1.5-inch screws near outer edges. Brace firmly (use foot or clamp) to eliminate gaps. Check level at top and bottom of each slide.
Attach Slides to Drawer Box
Now connect the drawer to the cabinet-mounted slides. Timing and alignment are key.
Align and Fasten in Sequence
Slide drawer into cabinet until front is flush. Use scrap wood blocks or a helper to hold it level. Fully extend slides and align drawer box with cabinet slides. Insert first screw into one side and check level across the front. Insert first screw on opposite side and recheck level across depth. Install second screw on each side.
The critical sequence is one side, level width, opposite side, level depth, then final screws. This prevents binding and ensures parallel alignment.
Install Drawer Fronts Perfectly
A well-aligned front makes the drawer look custom-built. Use temporary screws for perfect positioning.
Choose Pre-Made or Custom Fronts
Pre-made options like IKEA VEDDINGE fronts are affordable and high-quality. Custom fronts can be cut from 1-inch solid wood to match cabinetry. Modify as needed by cutting down height with a table saw, sanding edges, and adding a slight bevel to match factory finish.
Align Using Temporary Screws
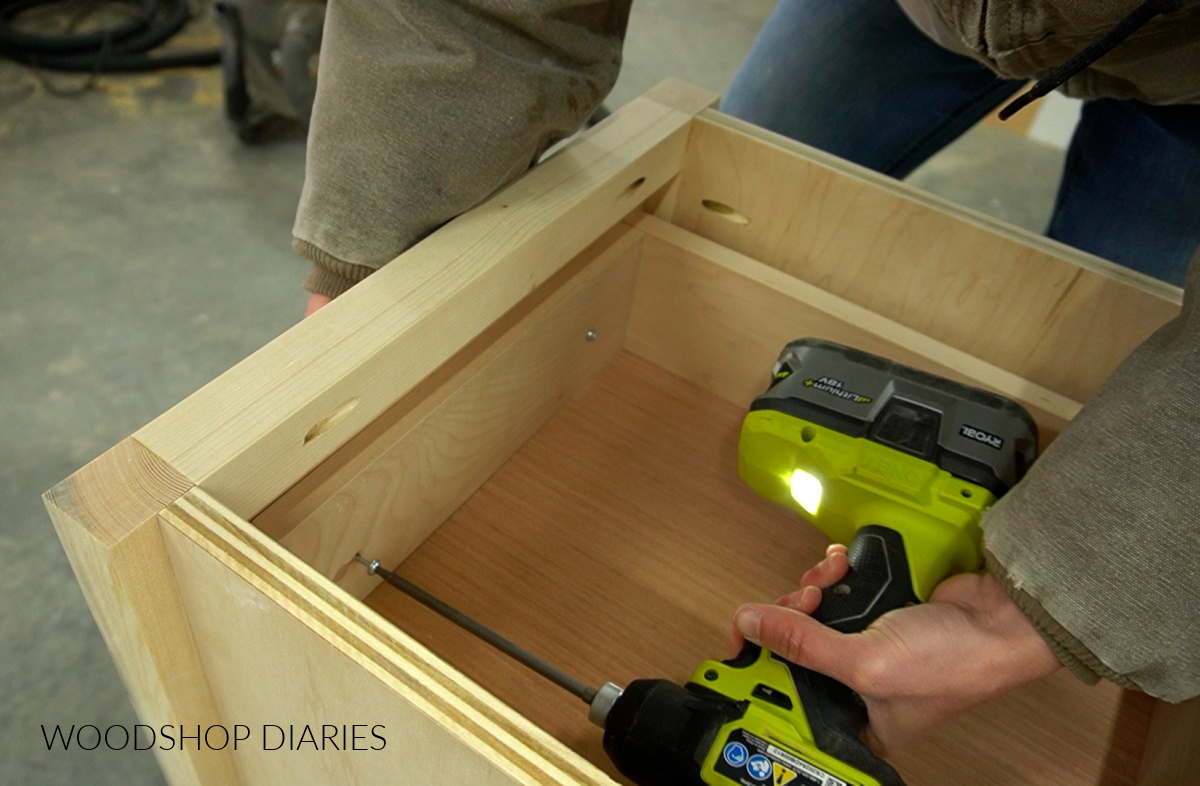
Mark pull location on front and drill pilot holes. Insert two long screws through front into drawer box (don’t penetrate back). Hold front flush with cabinet opening and secure with temporary screws. Open drawer fully. From inside, drive four 1-inch screws through box into back of front. Remove temporary long screws. This method eliminates gaps and ensures perfect flush alignment.
Mount Knobs or Pulls Correctly
Hardware is the final touch. Install it right to avoid damaging the finish.
Install Pulls Without Damage
Drill holes using correct bit size and insert mounting bolt from behind. Thread knob onto bolt from front. Hold knob still while tightening bolt from behind to prevent rotation that scratches paint. Use hand screwdriver, not a drill, for final tightening. Test fit hardware before final installation. Choose pulls that match your cabinet style, with cup pulls for traditional and bar pulls for modern.
Make Final Adjustments
Even with perfect prep, small tweaks ensure flawless function.
Test and Smooth Operation
Open and close drawer multiple times and check for binding or resistance. If sticking, slightly loosen slide screws and reposition. Ensure slides are parallel and level. Small misalignments cause big issues, so adjust incrementally.
Fill Gaps and Touch Up
Fill nail holes or gaps with wood filler. Sand and touch up with matching paint or repair marker (like Vera Fane). Apply 100% clear silicone around center dividers or loose veneer to prevent future loosening. Reattach cabinet doors if removed. The result is a drawer that looks like it was always part of the design.
Choose the Right Slides

Not all drawer slides are equal. Pick the right type for your project.
Full-Extension Slides Are Best
Full-extension slides allow 100% drawer access and are ideal for deep cabinets like pantries and vanities. Load ratings range from 75 to 100 pounds for standard slides to 150 plus pounds for heavy-duty options. Match slide length to cabinet depth, for example, 10-inch slides for 10.25-inch deep cabinet.
Soft-Close and Double Stack Options
Soft-close adds a luxury feel and prevents slamming. Double-stack slides provide two slides per side for heavy loads like tools or cans. For deep drawers with top-mounted pulls, place slides higher in the box to reduce tipping force.
Prevent Common Mistakes
Avoid these frequent errors to save time and frustration.
Binding Drawer? Check Alignment
Most binding issues come from uneven slide mounting, non-parallel installation, or insufficient back clearance. Recheck level and depth alignment, then loosen screws slightly and reposition.
Gaps Around Front? Use Temporary Screws
Permanent glue or screws too early cause misalignment. Always use the temporary screw method for perfect fit.
Uneven Finish on Cut Fronts?
Sand cut edges thoroughly. Apply wood conditioner before staining. Prime and paint uniformly.
Door Interference?
Ensure doors open beyond 90 degrees. Install European hinges with wider swing or relocate strike plates.
Frequently Asked Questions About Turning a Shelf into a Drawer
Can I convert any shelf into a drawer?
Yes, you can convert most enclosed cabinet shelves or open shelving units into drawers. The key requirements are having enough vertical clearance for drawer height plus slide mechanism and ensuring the cabinet or unit has solid sides to mount the slides.
What tools do I need to convert a shelf to a drawer?
You need a miter saw or table saw for cutting, a drill for driving screws, a brad nailer for assembling the drawer box, sandpaper for finishing, a level for alignment, and an iron for applying edge banding. A speed square helps ensure corners are square during assembly.
How much does it cost to turn a shelf into a drawer?
Total material costs typically run under $200, often much less if using repurposed parts. A typical breakdown includes plywood (around $26), edge banding ($20), drawer fronts ($37.50), full-extension slides ($36), primer ($20), paint ($28), and hardware ($17).
Do I need full-extension drawer slides?
Full-extension slides are highly recommended because they allow 100% drawer access, making it easy to reach items at the back. They cost slightly more than partial slides but significantly improve functionality, especially in deep cabinets like pantries.
Can I reuse the existing shelf as the drawer bottom?
Yes, if the shelf is solid and flat, you can repurpose it as the drawer bottom. Simply remove it carefully, cut down the width by 1 inch (0.5 inch per side) for slide clearance, and attach side panels to create the drawer box.
How long does this project take?
With precise planning, a skilled DIYer can complete the project in a weekend. The most time-consuming parts are measuring accurately, assembling the drawer box square, and allowing proper time for finish cure (24 to 72 hours for polyurethane).
Key Takeaways for Turning a Shelf into a Drawer
Transforming a shelf into a drawer is a smart, cost-effective upgrade that transforms cluttered spaces into organized, accessible storage. The process centers on three critical steps: measuring precisely to calculate drawer dimensions with proper clearance for slides, building a square drawer box that’s either repurposed from the existing shelf or constructed from plywood, and installing full-extension slides with careful attention to level and parallel alignment.
By using full-extension slides, applying edge banding for a finished look, and aligning drawer fronts with temporary screws, you achieve professional results without full cabinet replacement. The temporary screw method for front alignment is perhaps the most important technique because it ensures perfect flush fit and eliminates gaps that detract from the final appearance.
With total material costs under $200 and often much less using repurposed parts, this project delivers lasting value in kitchens, closets, bathrooms, and offices. Follow these steps, and you’ll wonder why you didn’t do it sooner.