
Measuring corner shelves might seem simple, but getting it wrong can lead to awkward gaps, wobbly installations, or shelves that simply do not fit. Whether you are installing a decorative display in your living room or maximizing storage in a kitchen corner, precise measurements are essential. The key is not just measuring the space, but understanding how walls meet, where studs lie, and what obstacles could interfere. This guide walks you through exactly how to measure corner shelf spaces correctly.
Most interior corners are not perfectly square, walls are not always straight, and hidden obstructions like baseboards or electrical outlets can throw off your plans. That is why a careful, systematic approach is crucial. You will learn how to check wall angles, account for depth and height, locate studs, and avoid common mistakes that lead to costly reorders or unsafe installations.
Gather Essential Measurement Tools
Before taking any measurements, assemble the right tools. Accuracy depends on having reliable equipment and using it properly.
Use a Tape Measure for Dimensions
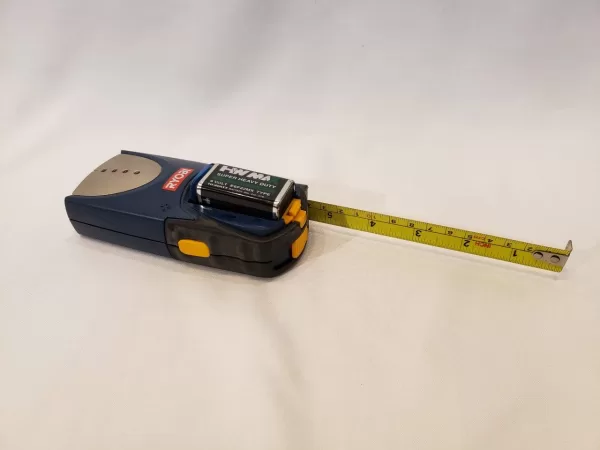
A steel tape measure is your primary tool. Extend it from the inside corner along both walls to record the shelf arm length. Measure in inches and record both sides separately, as many corners have uneven wall runs. Also use the tape to determine how far the shelf will project from the corner, which typically ranges between 4 and 14 inches depending on use.
Ensure Level Installation
Use a bubble level or digital level to draw straight reference lines across both walls at your desired shelf height. Even a slight tilt makes a shelf look unbalanced. Check the level both during marking and final installation.
Locate Wall Studs Safely
A stud finder detects wood or metal framing behind drywall. Mounting brackets into studs provides maximum support, especially for heavy loads. Scan both walls near the corner and mark stud centers every 16 inches, which is standard spacing in most homes.
Test Corner Squareness
Place a carpenter’s square or thick hardcover book into the corner. If there are gaps between the walls and the tool’s edges, the angle is not 90 degrees. For exact readings, use an angle finder or digital protractor to record the actual angle, which is critical for custom shelves.
Record Data Clearly
Write down all measurements, angles, and observations in a notepad or smartphone app. Include wall lengths for both sides, shelf depth, vertical height from floor, stud positions, corner angle, and any obstruction notes. Losing track of one number can result in a misfit shelf.
Determine Ideal Shelf Height and Placement
Choosing the right height affects both usability and aesthetics. Start here before measuring dimensions.
Set Functional Shelf Height
Mark the desired bottom edge of the shelf on both walls. Common eye-level mounting ranges from 48 to 60 inches above the floor, but adjust based on room and user needs. In kitchens, 15 to 20 inches above the countertop works well. In bathrooms, mount above the sink or toilet while avoiding mirror interference. For living rooms, aim for seated eye level for display visibility.
Avoid Common Placement Errors
Do not assume symmetry equals correctness. Align the shelf with surrounding cabinetry, trim, or furniture lines for visual harmony. Avoid placing shelves too high where they become hard to reach, or too low where they risk causing head bumps.
Identify Wall Obstructions Early
Hidden features can block installation or reduce usable space.
Check for Baseboards and Trim
Thick baseboards reduce available depth. Measure from the top of the trim if the shelf sits above it, or account for recessed mounting if cutting around molding.
Locate Electrical Outlets and Switches
If a shelf covers an outlet, it violates electrical codes and creates a fire hazard. Either reroute wiring or adjust shelf size to leave outlets fully accessible.
Note Vents, Pipes, and Backsplashes
In kitchens and bathrooms, backsplashes, exhaust vents, or plumbing may limit placement. Measure clearance needed and adjust shelf depth accordingly.
Measure Wall Lengths from the Inside Corner
Accurate arm lengths ensure the shelf fits snugly without overhang.
Record Each Wall Separately
Place the tape measure into the innermost point of the corner. Extend it along Wall A and then Wall B. Record both measurements independently. Never assume symmetry between the two walls.
Use Smaller Measurement for Symmetry
If one wall allows 28 inches and the other only 24 inches, use 24 inches for both sides unless you want an asymmetrical design. This prevents one arm from hitting an obstruction.
Re-Measure at Multiple Heights
Walls often taper or bow. Take measurements 2 inches above and below your target height line. If results vary, use the shortest measurement to guarantee fit.
Decide on Shelf Depth and Projection
Depth determines how much the shelf extends into the room.
Choose Based on Intended Use
Standard depth ranges serve different purposes. Shallow shelves of 4 to 6 inches work for decorative items like photos, candles, or small plants. Medium depth of 7 to 10 inches holds books, mugs, or small plants. Deep shelves of 11 inches or more accommodate heavy or bulky items like cookbooks or baskets.
Measure Diagonally for True Projection
From the inside corner, extend the tape measure diagonally outward at a 45-degree angle to estimate reach. Then confirm with perpendicular depth checks on each wall.
Balance Proportion and Space
In small rooms, deep shelves can feel bulky. Match depth to ceiling height and room scale, as taller spaces allow deeper projections.
Verify Corner Angle for Perfect Fit

Most corners are not exactly 90 degrees, which affects shelf alignment.
Test with Carpenter’s Square
Press the tool into the corner. Gaps on one side mean the angle is off. Even a 2 to 3 degree deviation can cause visible misalignment in prefabricated shelves.
Use Angle Finder for Precision
Digital angle finders or protractors give exact readings. Record this number, as it is essential when ordering custom corner shelves since standard 90-degree units will not fit.
Adjust Design for Non-Square Corners
Custom shelves are built to match your measured angle. For DIY builds, cut bracket arms to match the angle using a miter saw set to half the measured value.
Locate Studs for Secure Mounting
Strong mounting prevents sagging or collapse.
Scan Both Walls Thoroughly
Use a stud finder to check both sides of the corner. Mark stud centers with a pencil dot. Aim to place at least one bracket per arm into a stud.
Use Anchors When Studs Are Missing
If no stud aligns with a bracket position, install heavy-duty drywall anchors rated for the shelf expected load. Toggle bolts or snap toggles work best for heavier shelves.
Match Bracket Spacing to Stud Layout
Plan bracket placement based on stud locations, not convenience. Avoid mounting only into drywall for shelves holding more than 10 pounds.
Plan for Multiple or Stacked Shelves
Multi-tier setups need careful vertical coordination.
Space Shelves 12 to 15 Inches Apart
Measure from the top of the lower shelf to the bottom of the upper shelf. Add one-half inch extra clearance for removing tall items.
Account for Shelf Thickness
A three-quarter-inch thick shelf reduces usable space by that amount. Include this in your math when calculating spacing.
Consider Item Heights
Tall vases, lamps, or appliances need room. Test with real objects or mockups before finalizing distances.
Prepare for Integrated Lighting or Wiring
Modern shelves sometimes include built-in features.
Confirm Power Source Proximity
Ensure an outlet or junction box is nearby. If not, consult an electrician for safe wiring options.
Plan Concealed Wire Paths
Route cables through walls, baseboards, or use surface-mounted raceways. For custom shelves, request internal channels during fabrication.
Specify Needs Early
If ordering a custom shelf with lighting, mention wiring requirements upfront so cutouts or channels can be included.
Final Verification Before Purchase or Build
Double-check everything before committing to materials or orders.
Review All Measurements
Compare wall lengths, depth, corner angle, stud positions, and obstruction clearances. Ensure consistency across all data points.
Draw a Simple Sketch
Sketch the corner with labeled dimensions. Include height, angle, and stud marks. Share it with fabricators or contractors if needed.
Measure Twice, Cut Once
Re-measure all values one last time. Human error is the most common cause of ill-fitting shelves, especially in older homes with irregular walls.
Why Custom Corner Shelves Are Worth It
When precision matters, custom is the best choice.
Achieve a Precision Fit
Custom shelves are made to your exact measurements, including non-standard angles. They eliminate gaps and forced installations common with off-the-shelf models.
Choose Materials and Finishes
Select wood type like oak, walnut, or pine. Choose a finish such as painted, stained, or natural. Match existing furniture or create contrast for visual interest.
Hide Brackets and Hardware
Many custom designs feature concealed supports or floating mounts for a clean, modern look. No visible screws or brackets detract from the aesthetic.
Add Functional Upgrades
Consider options like built-in LED lighting, adjustable height systems, reinforced brackets for heavy loads, or moisture-resistant finishes for bathrooms.
Optimize for Load Capacity and Safety
Strength depends on more than just size.
Match Shelf to Expected Weight
Light-duty shelves up to 10 pounds hold decorative items. Medium-duty between 10 and 25 pounds holds books or kitchenware. Heavy-duty over 25 pounds requires stud mounting and thick material of three-quarter inch or more.
Use Adequate Support Brackets
Install at least two brackets per shelf. For spans over 24 inches, add a third centered bracket.
Choose Strong Materials
Solid wood or plywood three-quarter inch thick handles weight better than particleboard. For floating shelves, use solid hardwood or metal supports embedded into studs.
Apply Room-Specific Design Tips
Tailor shelves to their environment.
Kitchen: Maximize Storage Corners
Install near stoves or sinks for spices, oils, or utensils. Avoid placing directly above heat sources unless using heat-resistant materials.
Bathroom: Store Towels and Toiletries
Use moisture-sealed wood or laminate. Mount above the toilet or near the shower outside the splash zone.
Living Room: Display Collectibles
Use odd-numbered groupings for visual balance. Mix heights and textures for dynamic displays.
Bedroom: Supplement Nightstand Space
Hold lamps, books, or charging devices. This works great for small apartments where floor space is limited.
Home Office: Organize Supplies
Store notebooks, printers, or files. Keep cords tidy with integrated raceways.
Follow Visual Styling Best Practices
A well-styled shelf enhances any room.
Create Balanced Arrangements
Use the rule of threes and group items in odd numbers. Combine tall, medium, and short objects for rhythm.
Mix Textures and Heights
Pair a tall vase with a stack of books and a small sculpture. Vary materials like ceramic, wood, and metal for visual interest.
Leave Negative Space
Avoid overcrowding. Empty areas let the eye rest and make individual items stand out.
Avoid These Common Measuring Mistakes
Prevent costly errors with awareness.
Assuming All Corners Are 90 Degrees
They rarely are. Always verify angle with a square or protractor.
Ignoring Wall Obstructions
Baseboards, outlets, and vents can block installation. Measure around them.
Skipping Stud Checks
Mounting into drywall alone risks failure under load. Always locate studs first.
Measuring Only Once
One mistake ruins the whole project. Measure twice, especially in older homes.
Overloading Shallow Shelves
Depth does not equal strength. A 6-inch shelf may not hold heavy books without proper support.
Forgetting to Check Level
A tilted shelf is unsafe and unattractive. Use a level during setup and final install.
Frequently Asked Questions About Measuring Corner Shelves
What tools do I need to measure for a corner shelf?
You need a tape measure for dimensions, a pencil for marking, a level for alignment, a stud finder for locating framing, and an angle finder or protractor for checking corner angles. A notepad or smartphone app helps record all measurements.
How do I measure a corner that is not exactly 90 degrees?
Use a carpenter’s square to test the angle by placing it in the corner and looking for gaps. For precise readings, use a digital angle finder or protractor to record the exact angle. This measurement is essential when ordering custom shelves.
How far apart should corner shelves be spaced?
Standard spacing is 12 to 15 inches from the top of the lower shelf to the bottom of the upper shelf. Add one-half inch extra clearance for removing tall items, and account for the shelf thickness in your calculations.
Can I install corner shelves without finding studs?
You can use heavy-duty drywall anchors for light loads up to 10 pounds, but mounting into studs is strongly recommended for safety. Shelves holding books, kitchenware, or heavier items must be anchored into studs to prevent collapse.
What depth should I choose for my corner shelf?
Shallow shelves of 4 to 6 inches work for decorative items. Medium depth of 7 to 10 inches holds books and kitchenware. Deep shelves of 11 inches or more accommodate bulky items. Choose based on what you plan to display.
How do I measure for custom corner shelves?
Measure both wall lengths from the inside corner separately, measure the desired depth, record the corner angle with an angle finder, locate stud positions, and note any obstructions. Record all measurements clearly and verify twice before ordering.
Key Takeaways for Measuring Corner Shelves
Accurate measurement is the foundation of a successful corner shelf installation. Always measure both walls separately and use the shorter measurement if symmetry is desired. Check the corner angle with an angle finder since most corners deviate from perfect 90 degrees. Locate wall studs before mounting and prioritize stud placement for brackets whenever possible.
Account for all obstructions including baseboards, electrical outlets, and vents. Choose shelf depth based on intended use, and plan for adequate bracket support matching the expected weight load. For non-standard corners or precise fits, custom shelves are worth the investment. Measure twice, record everything, and double-check before purchasing or cutting any materials.