

If you’re tired of spray cans rolling under the workbench or craft bottles scattered across every shelf, a custom paint rack is the solution. Whether you’re storing aerosol cans, model paints, or large canvases, how to make a paint rack comes down to matching the design to your space, tools, and storage needs. This guide covers every proven method, from ultra-simple DIY builds using scrap wood to heavy-duty welded racks for professional artists.
No more cluttered cabinets or damaged artwork. With the right approach, you can create a tailored paint storage system in under an hour, or build a mobile studio rack that lasts decades.
Choose the Right Paint Rack Type for Your Needs
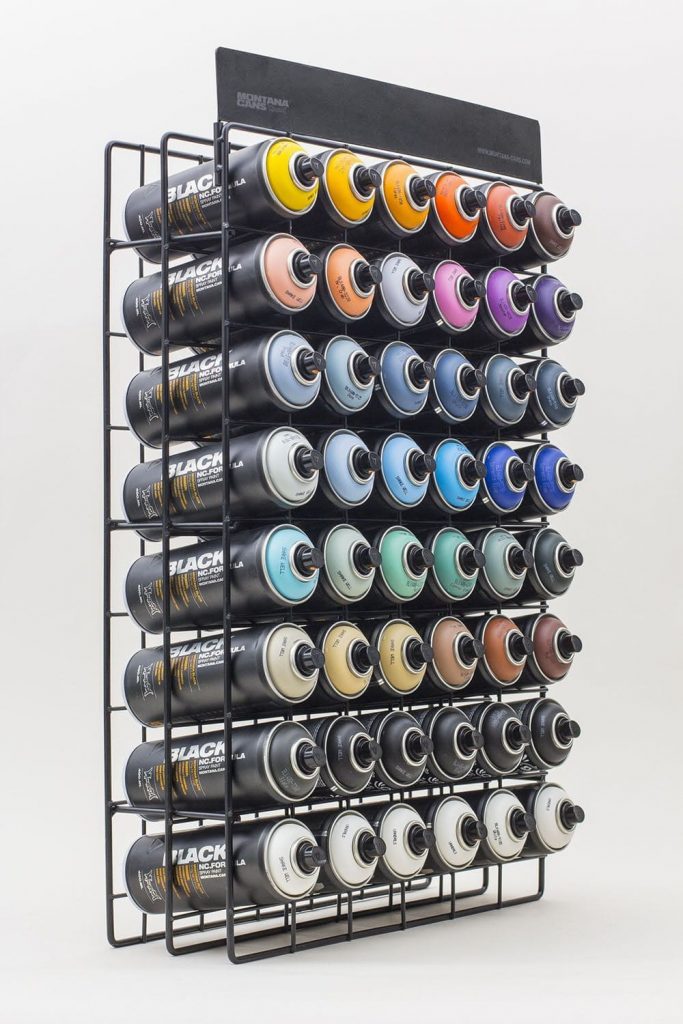
Before cutting any material, identify which type of paint you’re storing. Each has unique requirements for spacing, angle, and structural strength.
Spray Cans Need Angled Support
Standard aerosol cans measure 2.75 inches in diameter and about 8 inches tall. Storing them upright wastes space and risks tipping. An angled rack between 45 and 70 degrees keeps cans visible and secure while minimizing depth. L-shaped wooden shelves or dowel-based designs work best for this application.
Craft and Model Bottles Fit Vertical Storage
Miniature painters using Citadel, Vallejo, or Army Painter bottles need high-density storage. These dropper bottles stand upright and benefit from hole-based racks or UPVC wall shelves with tight spacing of 1.375 inches on center. Precision matters because misaligned holes make insertion difficult and can damage labels.
Large Artworks Require Heavy-Duty Frames
Finished or wet canvases must stay off the floor and avoid stacking pressure. A rebar frame with wheels supports heavy loads and rolls easily through studios. X-bracing prevents wobbling, and full welding ensures long-term stability for expensive artwork.
Multi-Use Racks Save Space
Some designs double as spice racks, thread storage, or display units. UPVC angle shelves and wire-grid frames are modular and adaptable to non-paint uses. Consider future needs when planning your build.
Plan Capacity and Spacing for Your Paint Collection
Underestimate capacity at your peril. Most hobbyists grow their collections fast. Plan for 20 to 30 percent more capacity than your current inventory.
Calculate Your Storage Needs
Use these standard measurements to ensure easy access.
| Paint Type | Height | Recommended Gap |
|---|---|---|
| Citadel Bottles | 60mm | 60mm (2.5 inches) |
| Vallejo Primer | 100mm | 100mm (4 inches) |
| Spray Cans | 8 inches | 3 inches vertical |
| Acrylic Bottles | Varies | 1.375 inches on-center holes |
Adam Savage’s model paint rack holds 70 bottles per unit, which equals 210 total across three racks. Wilker Do’s spray rack stores 27 cans in one 45-degree unit. Tim Chubb’s UPVC shelf holds over 160 craft bottles. Design for eight bottles per side instead of seven, even if you do not need the extra space yet.
Select Materials Based on Your Build Type
The right material makes or breaks your paint rack. Choose based on load requirements, tools available, and budget.
Pine Boards for Spray Can Shelves
1×3, 1×4, and 1×6 pine boards are cheap, easy to cut, and strong enough for lightweight storage. A 1×3 plus 1×4 combo forms an L-shaped shelf for spray cans. Use 1×6 boards, 24 inches long, as side supports. Expect to pay about 35 dollars for a full five-shelf unit. Upgrade to 3/4-inch plywood for heavier loads.
UPVC Angle for Craft Bottle Storage
L-shaped UPVC trim, commonly used in bathrooms, makes wall-mounted shelves without any tools. Cut into 32-inch lengths for wide racks. Glue end cheeks from off-cuts for containment. Mount with grab adhesive and no screws required. User feedback confirms it holds over 160 bottles and survives six months with zero failures.
Rebar for Heavy Art Racks
Five-eighths inch or three-quarter inch rebar forms rigid vertical supports for large artwork. Weld into a mobile frame with reused wheels. Add X-bracing from scrap rebar to prevent racking. Fully weld all joints for maximum strength. Wear protective gear when cutting and welding.
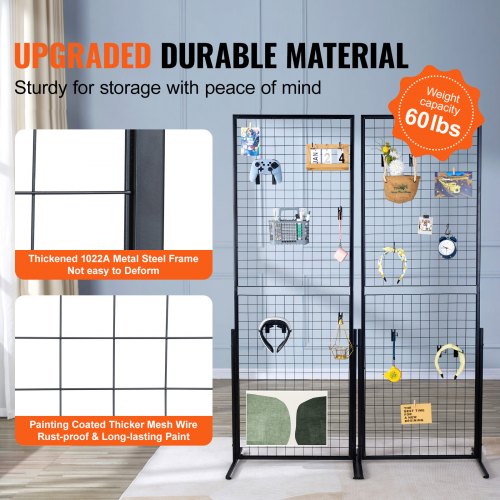
Wire Grids for Industrial Craft Racks
Salvage shelves from old storage cubes for about five dollars or free. Fit them into grooves cut in half-inch wood frame. Use one-quarter-inch square doweling strips if you lack a table saw. Stain with Minwax Golden Oak for a polished look.
Build a 45° Angled Spray Can Rack
This design offers the best balance of speed, cost, and functionality for spray paint storage. Expect to complete it in under 60 minutes.
Cut Materials to Size
Gather these materials.
• Two 1×6 boards, 24 inches long (side supports)
• One 1×3 board, 22 inches long (shelf base)
• One 1×4 board, 22 inches long (shelf vertical leg)
• Miter saw, framing square, sandpaper (120 to 220 grit)
The 1×4 becomes the vertical back leg while the 1×3 serves as the horizontal base.
Assemble L-Shaped Shelves
Attach the 1×4 perpendicularly to the edge of the 1×3 using wood glue and trim nails. Sand all corners smooth because splinters ruin usability and damage fingers. Repeat this process for all five shelves.
Mark Shelf Positions
On each 1×6 side board, mark drilling points at 3 inches, 8 inches, 13 inches, 18 inches, and 23 inches from the bottom. This creates five-inch spacing between shelves. Mirror the marks on the second board to maintain angle alignment. Use a 45-degree framing square to ensure shelves sit at the correct tilt.
Attach Shelves and Mount to Wall
Align the front edge of the L-shelf with the side board and check the angle with your square. Secure with wood glue and trim nails. Use two screws through upper corners into wall studs. For drywall, use anchors rated for 50 pounds or more. The result holds 25 to 30 spray cans, with the top shelf perfect for touch-up paints.
Create a Dowel-Based Spray Can Rack from Scrap Wood
This minimalist approach uses entirely scrap materials and costs under 10 dollars.
Prepare the Side Boards and Dowels
Cut one 1×6 board into two 48-inch side boards. Source 3/8-inch dowels, 20 pieces, 3 to 4 inches long. You will also need scrap plywood or paneling for the back panel.
Mark 45° Drill Lines
Clamp the boards together. Draw a line starting 2 inches from the bottom, angled at 45 degrees. Repeat every 4.5 inches, creating 10 lines total. On each line, mark two points: one 2.5 inches from the back edge and one 0.75 inches from the front edge.
Drill, Insert, and Finish
Drill 3/8-inch holes at each marked point and insert dowels snugly without glue. The dowels cradle cans at 45 degrees and prevent rolling. Screw thin plywood to the back for stability. Optionally attach small wheels to the bottom rear corners for mobile storage. This design holds up to 20 spray cans and is best for light-duty use.
Construct a Wire-Grid Craft Bottle Storage Rack
This industrial-style rack consolidates bottles from multiple locations into one attractive unit.
Build the Wood Frame
Cut side pieces to 14 7/8 inches long from half-inch plywood or 1×4. Cut top and bottom pieces to 13 13/16 inches long. This allows 1/8-inch inset for shelves and back panel.
Cut Grooves for Shelves
Set your table saw blade to 1/8-inch height. Cut grooves into inner edges of top and bottom pieces only. Make grooves 1/4-inch wide for the back panel and just under 3/16-inch wide for wire shelves. If you lack a table saw, glue two 1/4-inch square doweling strips along inner faces to create channels instead.
Assemble the Rack
Sand inner surfaces with 150-grit paper. Glue and brad nail sides to bottom. Insert the back panel, then slide in wire shelves. Attach the top with glue and nails. Let cure overnight.
Finish and Mount
Stain with Minwax Golden Oak. Wipe excess and let dry 24 hours before mounting. Hang with two screws into studs or heavy-duty anchors. Slight skew from warped wire shelves is normal and does not affect strength.
Make a Hole-Based Model Paint Rack
This high-density design stores 70 or more bottles per rack using precisely drilled holes.
Use Quarter-Inch Luan Instead of Thinner Board
One-eighth-inch H&S Sport board warps easily. Quarter-inch Luan resists warping and holds its shape. Cut multiple 3-inch by 12-inch shelves at once for efficiency.
Gang Drill for Precision
Clamp all pieces together and drill 1.25-inch diameter holes using a drill press. Maintain 1.375-inch on-center spacing, which fits standard bottles. Allow about 1/16-inch clearance for easy insertion. Use a vise with fence to hold boards square and test on scrap first.
Assemble and Expand
Shelves can stand alone or mount on backing. Misdrilled pieces work perfectly as bottom shelves where precision matters less. Design for eight bottles per side instead of seven to allow for collection growth.
Install UPVC Angle Shelves (No-Tools Option)
This beginner-friendly method requires no power tools and costs under 12 dollars.
Cut and Prepare UPVC
Standard length is 810mm (32 inches) for full racks. A shorter version at 700mm (27.5 inches) works for limited spaces. A handsaw cuts UPVC cleanly.
Make End Cheeks
Cut end cheeks from off-cuts, the same length as the long leg of the L-shape. Glue perpendicularly to shelf ends using super glue or grab adhesive. Clamp until cured.
Plan Spacing and Mount
Place bottom shelves 100mm apart for large bottles and top shelves 60mm apart for small Citadel-sized bottles. Apply a bead of grab adhesive to the back and press directly to the wall. Alternatively, glue shelves to MDF or acrylic backing, then mount the backing. Use masking tape to hold everything in place during the 24-hour cure.
Build a Mobile Artwork Rack with Welded Rebar
For professional studios storing large canvases, a welded rebar rack provides unmatched strength and mobility.
Repurpose a Metal Frame
Source an old equipment frame with wheel assemblies. Remove wheels by hand, though one may require a pipe wrench. Trim the width to fit your workspace.
Reinforce and Weld
Cut scrap rebar into an X-shape and weld across the bottom frame to prevent lateral racking. Tack-weld rebar at the bottom while a helper holds it steady. Install side braces before the top bar, then fully weld all joints.
Test Before Use
Stand on the rack with full body weight. If there is no wobble, it is safe. Roll it around the shop to ensure wheels turn smoothly. X-bracing adds massive stability to this design.
Mount Your Paint Rack Securely
Use a spirit level for all wall-mounted racks to prevent crooked appearance. Use masking tape to hold racks in place while adhesives cure. Wait 24 hours before loading racks with paint. For heavy racks, always anchor into wall studs. Drywall anchors work for lighter loads if rated for 50 pounds or more.
Final Tips for Paint Rack Success
Sand all edges before finishing to prevent splinters. Test load capacity before trusting your rack with valuable paint. Add wheels to any vertical rack for mobility within your space. Customize spacing for your specific bottle sizes. Build modular because you can always expand later.
There is no one-size-fits-all paint rack. But with these designs, you can make a paint rack that fits your space, tools, and workflow, whether you are a weekend hobbyist or a full-time artist. Pick a plan, gather materials, and clear the clutter for good.
Frequently Asked Questions About Making a Paint Rack
What is the easiest paint rack to build for beginners?
The UPVC angle shelf system requires no power tools and costs under 12 dollars. Cut lengths with a handsaw, glue end cheeks, and mount directly to walls with grab adhesive. It holds over 160 bottles and takes less than an hour.
How much does a spray can rack cost to build?
A 45-degree L-shaped spray can rack costs approximately 35 dollars in pine lumber. It holds 25 to 30 cans and takes under 60 minutes to build. A dowel-based version costs under 10 dollars using scrap wood.
What spacing do I need for model paint bottles?
Use 1.375-inch on-center spacing for standard dropper bottles like Citadel and Vallejo. Drill 1.25-inch diameter holes in half-inch Luan plywood. Allow approximately 1/16-inch clearance for easy insertion and removal.
Can I make a paint rack from scrap materials?
Yes. The dowel-based spray rack uses entirely scrap wood and costs under 10 dollars. Wire-grid craft racks use salvaged shelves from old storage cubes. Even the welded rebar artwork rack can be built from repurposed metal frames.
How do I mount a paint rack to drywall?
Use anchors rated for 50 pounds or more for heavy loads. For optimal strength, locate wall studs and screw directly into them. Use a spirit level during installation and allow adhesives 24 hours to cure before loading.
Key Takeaways for Building Your Paint Rack
The right paint rack eliminates clutter, protects your supplies, and saves time. Choose your design based on what you are storing. Spray cans need angled 45-degree shelves. Model bottles thrive in hole-based or UPVC systems. Large artwork requires welded rebar frames with wheels. Plan for 20 to 30 percent more capacity than you currently need because collections grow. Start with a simple build like the UPVC shelves if you are new to DIY, or tackle the L-shaped spray can rack for a project that completes in under an hour.


