

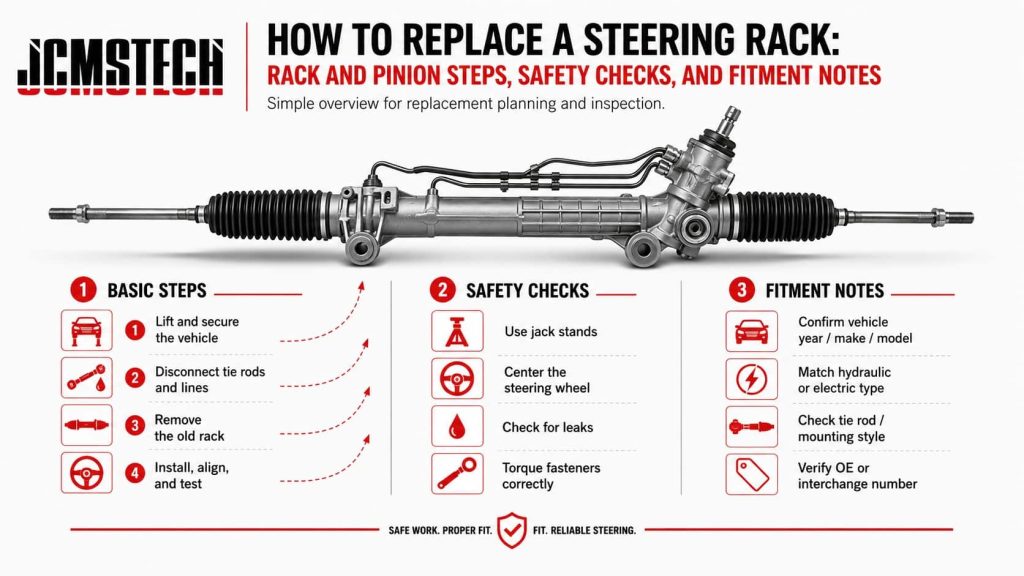
Replacing a steering rack is one of the most challenging front-end repairs a DIYer can attempt. When your vehicle develops excessive play, clunking noises, or fluid leaks from the steering system, the rack may be failing. Ignoring these symptoms risks loss of control, uneven tire wear, and unsafe driving conditions. But before grabbing tools, it is critical to confirm the problem lies with the rack, not tie rods, bushings, or the power steering pump.
The solution is a full steering rack replacement, not repair. Seals inside the rack degrade over time, and while some claim to rebuild them, factory-level precision is nearly impossible without specialized equipment. This guide walks you through every phase: diagnosing failure, removing the old unit, installing the new one, and bleeding the system properly.
Diagnose Rack Failure Before Replacing
Confirm the Rack Is the Problem
Before replacing the rack, rule out other common causes of steering problems. Worn tie rod ends cause looseness and clunking. Bad control arm bushings lead to drifting and vague handling. Low power steering fluid creates noise and stiffness. A faulty power steering pump mimics internal rack failure. A misdiagnosis leads to wasted time and money, so do not replace the rack unless you have confirmed internal wear or leakage.
Check for Fluid Leaks and Play
Inspect the steering rack boots under the vehicle. If they are cracked, torn, or soaked in fluid, the inner seals are failing. Look for puddles of red or amber fluid near the rack, which is a sure sign of leakage. Next, test for free play. Have a helper turn the steering wheel slightly left and right while you watch the input shaft on the rack. If the wheel moves but the shaft does not, the rack has internal slop and must be replaced.
Perform a Dry Steering Test
With the engine off, turn the steering wheel lock-to-lock. Listen for clunking or grinding sounds. These indicate internal damage or worn joints. If noise comes from the rack area and correlates with movement, replacement is needed.
Why Replacement Beats Repair Every Time
Avoid Rebuilding the Rack Yourself
Some guides suggest replacing rack seals to save money, but this is not recommended for DIYers. Disassembling the rack exposes it to dirt and contamination. Internal tolerances are extremely tight, hard to restore at home. Re-sealing often fails within weeks due to improper installation. Special tools are needed to press components without damage. Even professional shops rarely rebuild racks in-house because the risk outweighs the cost savings.
Choose a Complete Replacement Assembly
The best practice is to install a complete new steering rack. This ensures factory-calibrated internal components, fresh seals, and smooth operation. Choose OEM (Original Equipment Manufacturer) if possible. Aftermarket units vary in quality, and some fail prematurely due to poor machining or substandard materials.
Gather Essential Tools for the Job
Required Hand Tools
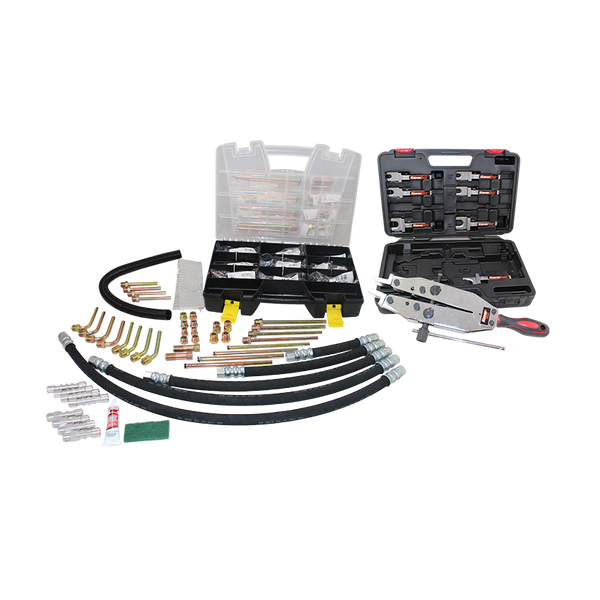
You will need a full set of metric sockets and wrenches, including 10mm, 12mm, 17mm, 19mm, 22mm, 24mm, 25mm, and 27mm sizes. A flex-head ratchet helps with tight spaces. Long extensions in 6″, 10″, and 14″ lengths reach buried bolts. A 1/2″ drive torque wrench is non-negotiable for final tightening. A breaker bar tackles stubborn bolts. You will also need pry bars, a brass hammer, needle-nose pliers, and penetrating oil like PB Blaster applied overnight on rusted fasteners.
Specialty Tools You May Need
An OTC 6296 tie-rod separator cleanly removes tie rod ends without damaging threads. A 17mm flare wrench prevents rounding soft metal power steering lines. A crowfoot wrench reaches hard-to-reach fittings. A hydraulic engine jack lifts the engine on tight-clearance vehicles. A bench vise holds the new rack during prep. A Dremel with cutting disc cuts obstructing bolts if needed. An air chisel breaks seized steering shaft connections.
Follow Critical Safety Protocols
Lift and Support the Vehicle Properly
Always use jack stands rated for your vehicle is weight. Never work under a car supported only by a hydraulic jack. Place wheel chocks on rear tires. Wear safety glasses and gloves. These basics save lives.
Prevent System Damage
Relieve power steering pressure before disconnecting lines. Turn off the engine and turn the steering wheel lock-to-lock 5 to 10 times. Disconnect the battery ground cable on some models to avoid ECU issues. Cap all open lines immediately to prevent fluid loss and contamination. Support suspension components with bungee cords, never let knuckles hang by brake lines.
Prepare the Vehicle for Repair
Lift and Remove Wheels
Jack up the front end and secure on jack stands. Remove front wheels for full access. Remove skid plate or underbody shields as needed.
Center the Steering Wheel
Turn wheels straight ahead. Insert the key and turn to the “ACC” position to lock the column. This prevents the wheel from rotating during removal.
Mark Critical Alignment Points
Count and record the number of exposed threads on outer tie rods. Make paint marks on the intermediate shaft, steering column, and pinion input shaft. Measure distance from rack housing to inner tie rod on both sides and record it. These steps preserve toe alignment and prevent post-installation steering wheel issues.
Remove Outer Tie Rods
Loosen and Separate Each Side
Remove the cotter pin and castle nut (19-24mm) from each tie rod end. Use the OTC 6296 puller to separate the tie rod from the steering knuckle. Avoid hammering, which damages the knuckle. Unscrew the outer tie rod from the inner rod and count the number of rotations. Slide the boot off the inner tie rod. Repeat on both sides.
Disconnect the Steering Shaft
Separate at the Pinion
Locate the coupling between firewall and frame. Remove the pinch bolts. Use a pry bar and hammer to break the joint free. An air chisel may be needed if seized. Keep all hardware for reuse.
Disconnect Power Steering Lines
Drain and Cap Open Lines
Place a drain pan under the rack. Use a 17mm flare wrench to disconnect the high-pressure line. Remove the banjo bolt carefully. Disconnect the low-pressure return line. Immediately cap all open ends with vacuum caps on metal lines and silicone plugs on hoses.
Clear Obstructions on Tight Vehicles
5th Gen 4Runner AC Compressor and Bracket
On tight-clearance vehicles like the 2010-2023 4Runner, you must remove several components. Remove the serpentine belt using a 14mm socket and rotate the tensioner. Unbolt the AC compressor (three 12mm bolts plus one nut) and support it with wire. Drain oil and remove the filter. Remove two nuts and one bolt (12mm) securing the oil filter bracket. Disconnect end links (17mm plus 6mm hex) and remove the sway bar.
Remove Mounting Bolts
Extract Frame Fasteners
Identify the two mounting bolts (one per side). Remove with a 19mm socket. The passenger side is usually accessible. The driver side may need a flex-head ratchet or Dremel to cut the bolt. Remove bushings and note their orientation.
Extract the Old Rack
Slide It Out Carefully
Gently wiggle and rotate the rack to free it. On tight vehicles, remove the driver-side engine mount (14mm bolts). Loosen the passenger mount and transmission mount (17mm nuts). Insert an M10 x 1.5mm alignment bolt on the passenger side. Lift the engine slightly with a hydraulic jack. Slide the rack from driver to passenger side through the frame groove.
Prep the New Rack Before Installation
Set Length and Install Components
Secure the new rack in a bench vise. Remove pre-installed tie rods if present. Adjust the sleeve length with smooth-jaw pliers to match the old rack measurement. Transfer boots only if undamaged, though they are usually not reusable.
Install the New Rack

Mount and Torque to Specification
Feed the rack from the passenger side. Rotate into position. Insert polyurethane bushings with silicone grease, ensuring correct orientation. Insert mounting bolts bottom to top for easier future removal. Install the washer and nut on the driver side. Torque to 74 ft-lb for LX470 or 89 ft-lb for 4Runner. Apply copper anti-seize to threads.
Reconnect Hydraulic Lines
Avoid Leaks with Proper Technique
Reattach high-pressure and low-pressure lines. Use a flare wrench or crowfoot, never a standard wrench. Torque the high-pressure banjo bolt to 31 ft-lb (LX470) or 33 ft-lb (crowfoot). Torque the low-pressure line to 31 ft-lb. Do not overtighten, as brass fittings crack easily.
Reattach the Steering Shaft
Align Match Marks
Align paint marks on the shaft and pinion. Slide the shaft onto splines. Insert and tighten pinch bolts. Apply anti-seize to splines. Check for smooth rotation with no binding.
Reinstall Tie Rods
Match Thread Count Exactly
Screw outer tie rods into inner rods using the same thread count recorded during removal. Install lock nuts (27mm) and castle nuts (24mm). Torque castle nuts to 90 ft-lb for LX470. Insert new cotter pins. Apply anti-seize to threads.
Reassemble Removed Components
Reverse the Disassembly Order
For Lexus LX470, reinstall engine and transmission mounts. Reconnect fan shroud, AC brackets, and airbox. Replace the skid plate. Refill engine oil with a new filter. For 5th Gen 4Runner, reinstall the oil filter bracket and feed lines. Reattach the AC compressor (torque to 18 ft-lb). Reinstall the serpentine belt. Reconnect differential bolts. Reinstall the sway bar and end links. Mount wheels and lower the vehicle.
Bleed the Power Steering System
Remove Air Safely
Fill the reservoir with Dexron III-compatible ATF to the “cold MAX” line. Turn the wheel lock-to-lock 5-15 times with the engine off. Check and top off fluid. Start the engine and idle. Turn the wheel slowly lock-to-lock. Fluid may froth, which is normal. Repeat until the level stabilizes and no bubbles appear. Top off to “hot MAX” once warm.
Final Inspection and Test Drive
Check Before Driving
Inspect all connections for leaks. Verify smooth steering effort. Listen for noise (whining, clunking). Check for play in the wheel. Recheck the fluid level.
Test Drive and Follow Up
Drive slowly at first. Assess handling and centering. Schedule a professional alignment immediately, even with careful thread matching. Recheck fluid after 10-20 miles. Inspect bolts for loosening using witness marks. Monitor for leaks weekly for the first month.
Frequently Asked Questions About Steering Rack Replacement
How do I know if my steering rack needs replacing?
Common signs include visible power steering fluid leaks from the rack housing, excessive free play in the steering wheel, groaning or whining noises during low-speed turning, stiff or binding steering, clunking sounds over bumps, and uneven tire wear. Have the system professionally diagnosed to confirm the rack is the cause.
Can I replace just the seals instead of the entire rack?
Seal replacement is not recommended for DIYers. The process exposes internal components to contamination, requires precision tolerances difficult to achieve at home, and often fails within weeks. Professional shops also rarely rebuild racks due to these challenges. Full replacement is the reliable solution.
How long does it take to replace a steering rack?
The job takes 6-10 hours for experienced DIYers with proper tools. Preparation and marking add time. Tight-clearance vehicles like the 5th Gen 4Runner require additional component removal, extending the timeline.
What tools are absolutely essential for this job?
A complete metric socket set, torque wrench, flare wrench, OTC tie-rod puller, penetrating oil, and jack stands are minimum requirements. A hydraulic engine jack is needed for certain vehicles. Loan-a-tool programs at auto parts stores can help with specialty items.
Do I need a professional alignment after replacement?
Yes. A professional alignment is mandatory after steering rack replacement. Even with careful thread matching and marking, the toe alignment will likely be off. Driving without alignment risks uneven tire wear and compromised handling.
What happens if I do not bleed the power steering system properly?
Air in the system causes spongy steering, noise (whining or groaning), and can damage the power steering pump. Running the pump dry or with air can cause permanent damage. Thorough bleeding is critical for system longevity.
Key Takeaways for Successfully Replacing Your Steering Rack
Replacing a steering rack is a major job, but with the right preparation, tools, and care, it is within reach for skilled DIYers. Always diagnose the problem first to confirm the rack is the culprit, then invest in a quality OEM replacement rather than attempting a rebuild. Mark every critical alignment point during removal, including tie rod thread counts, steering shaft positions, and rack centering measurements. Torque all fasteners to specification, paying special attention to the banjo bolts and mounting hardware. Bleed the system thoroughly to remove all air, and never skip the professional alignment afterward. Take your time, follow each step carefully, and drive with confidence knowing your steering system is restored to like-new condition.


