

If you’ve ever needed to extend your bike ride beyond what’s practical, you have probably considered combining cycling with public transit. The good news is that most city buses across North America come equipped with front-mounted bike racks, and using them is completely free. Whether you are a daily commuter or an occasional rider, knowing how to use a bus bike rack can open up new routes and make your journey more flexible.
This guide covers every step from approach to unloading, based on procedures from major transit agencies like Metro LA, MBTA, TriMet, and SMART. By the end, you will know exactly how to deploy the rack, position your bike correctly, secure it safely, and what to do when you reach your stop.
Approach the Bus from the Curb Side
Before the bus arrives, position yourself correctly on the curb side of the street near the front door where the driver can see you. Have your bike ready and remove loose items like water bottles, bags, or phone mounts that could fall off during transit.
As the bus pulls up, make eye contact with the driver or raise your hand to signal you plan to use the bike rack. Wait for clear acknowledgment, such as a wave or nod, before moving toward the front. Never walk in front of the bus without confirmation.
Lower the Bike Rack
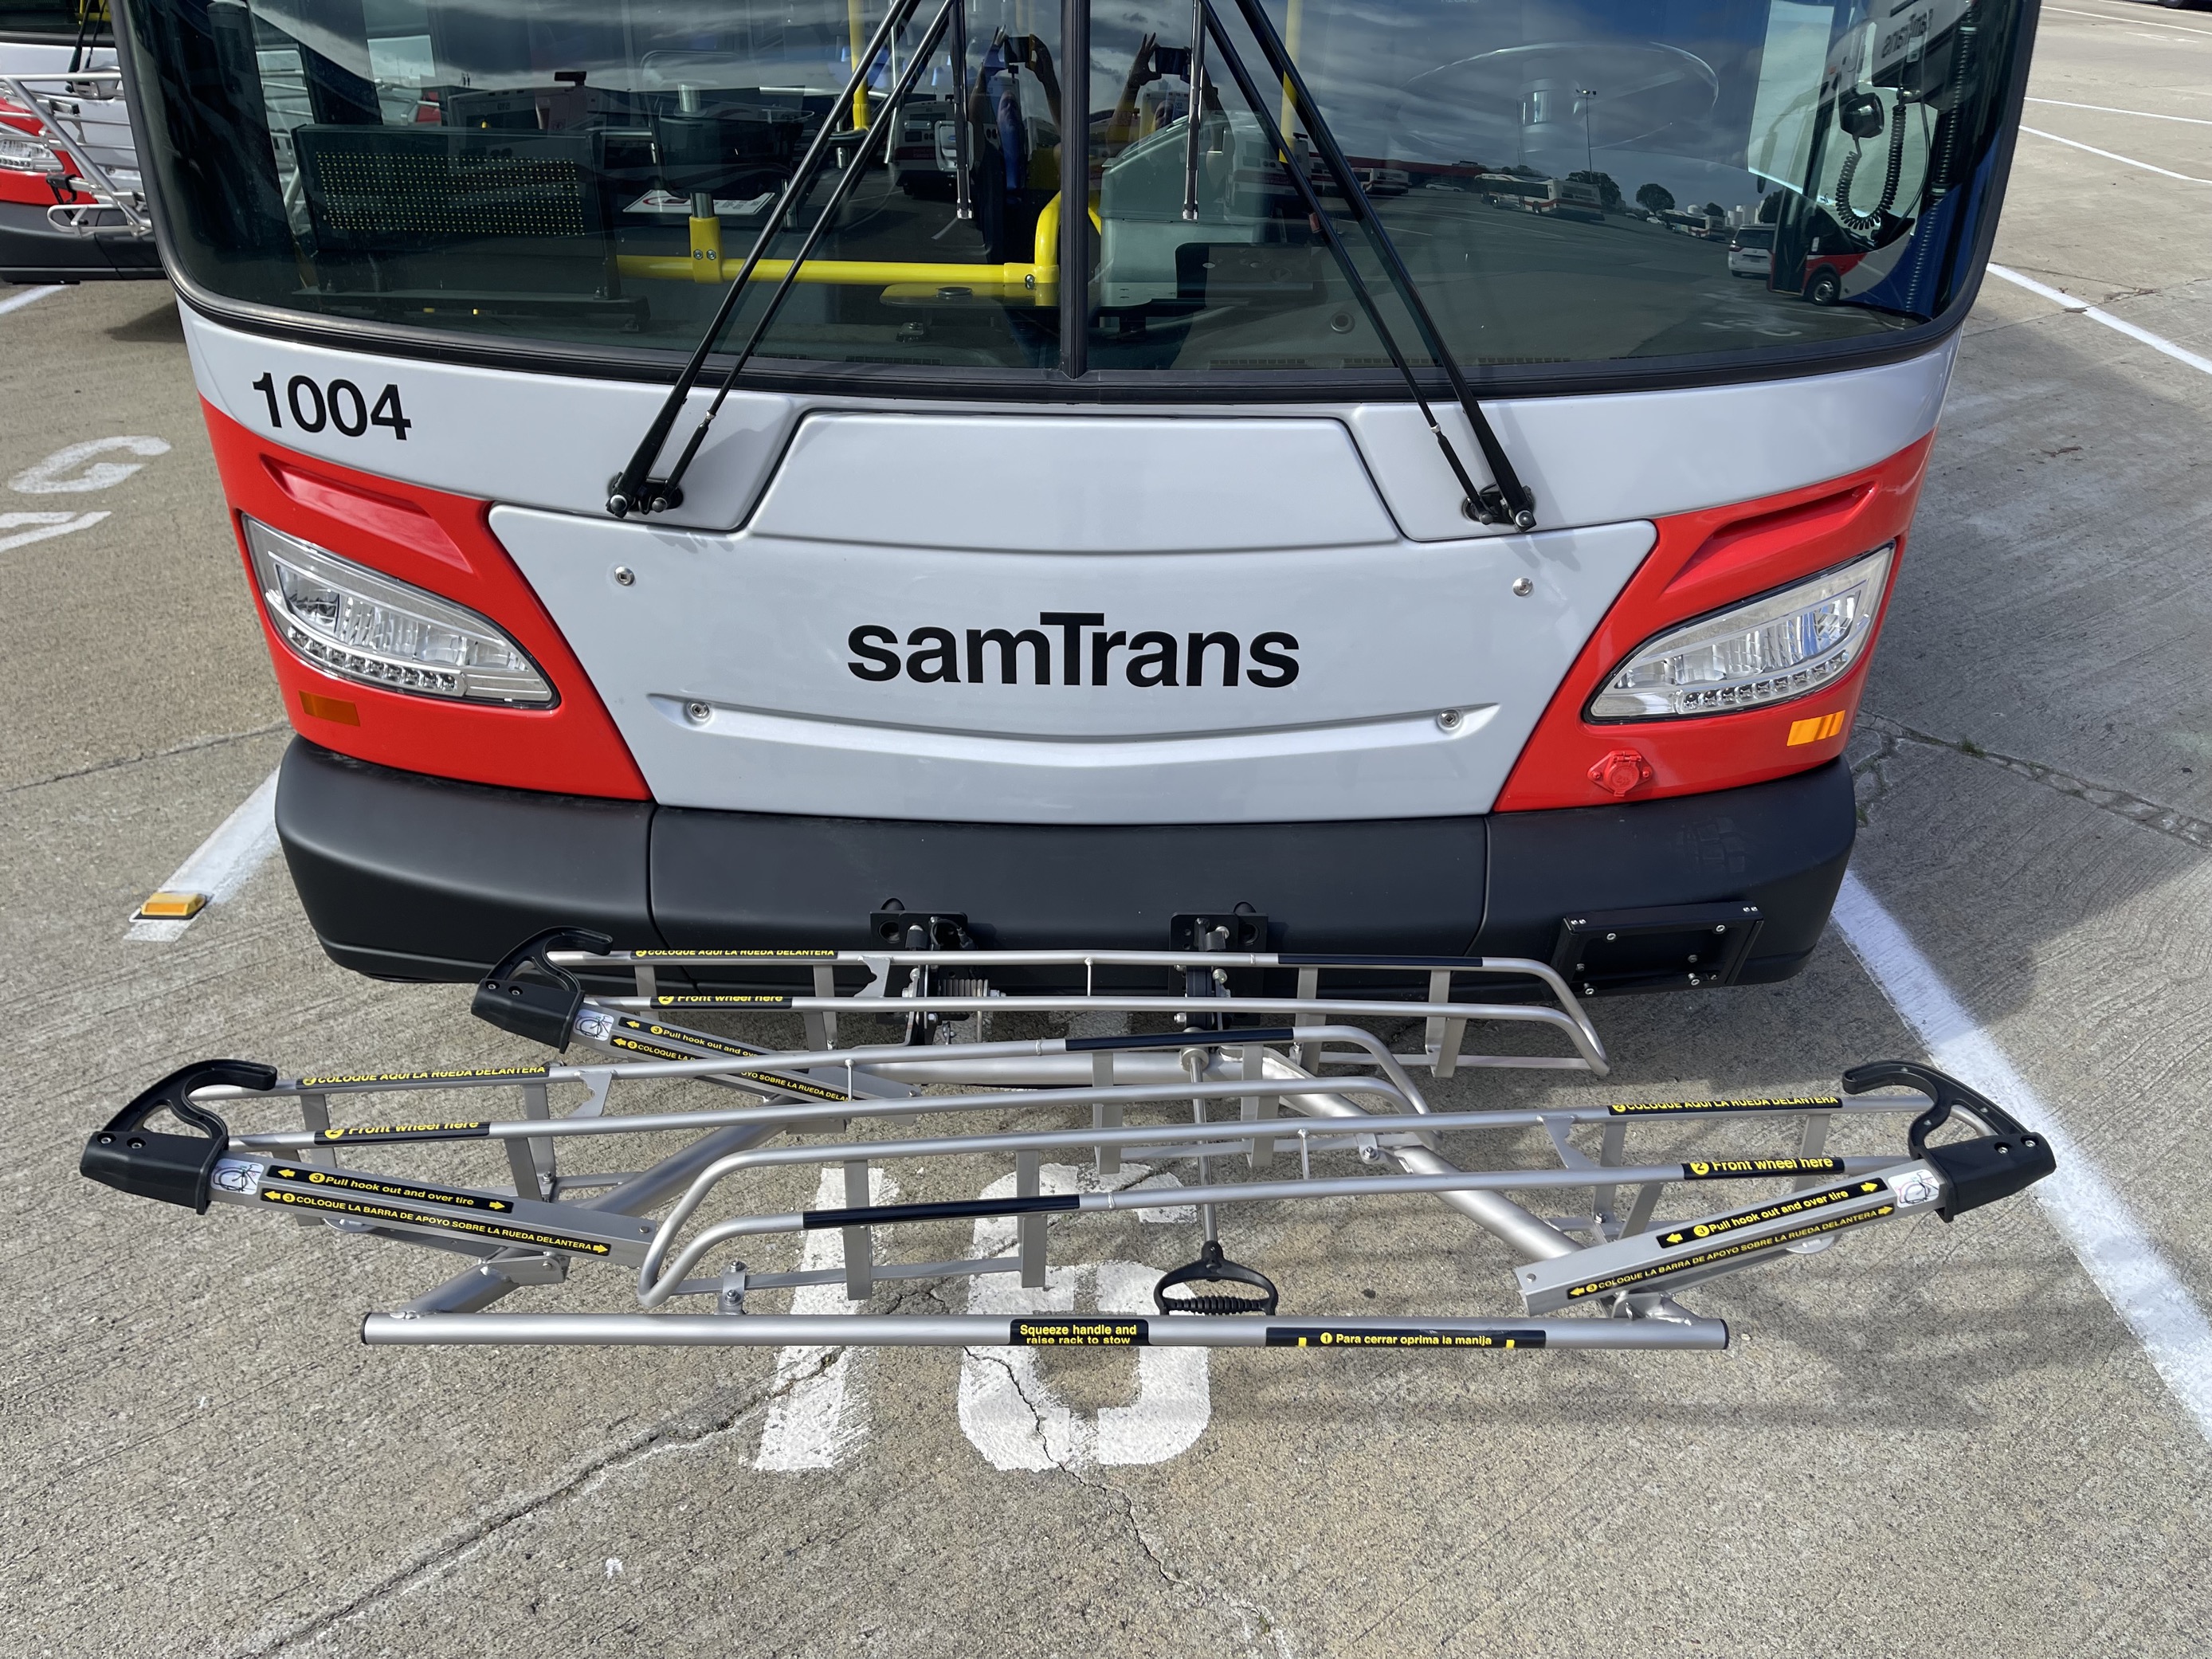
Once the driver sees you, locate the release mechanism on the folded rack. Most models use a squeeze handle at the center or top. Squeeze it upward or inward depending on the model, then gently lower the rack until it clicks into place horizontally.
Rack variations include:
- Cyclone models: Squeeze the center handle
- ART and SMART models: Pull a top-mounted lever
If the rack is already down and has space, skip this step. If the rack does not lower easily, do not force it. Confirm the bus has fully stopped and wait for driver assistance if needed.
Load Your Bike into an Empty Slot
With the rack deployed, place your bike into an empty wheel slot. How you do this depends on which slot is available and your rack model.
Use the Outer Slot First
Most agencies including Metro, TriMet, and SMART require you to load into the outermost slot first, farthest from the bus. This gives the driver better visibility and prevents interference with traffic. Fill remaining slots moving inward, using only one bike per slot.
MBTA in Boston is the exception: load the inner slot first, closest to the bus.
Face the Front Wheel Toward the Curb
Face the front wheel away from traffic, toward the curb, unless on-rack labels indicate otherwise. This reduces the risk of accidental contact with passing vehicles. Check for instructional decals on the rack showing wheel direction and hook placement.
Secure the Front Wheel with the Support Arm
Now comes the critical step: locking your bike in place. Locate the support arm, also called a swingarm or hook. Squeeze the black button or lever, pull it straight out, and lift it over the front tire. Hook it securely over the tire, positioning the tip near the top of the wheel close to the frame.
Proper hook placement includes:
- Hook over the tire or fender
- Ensure firm contact with the tire
- Keep arms clear of frame, handlebars, or baskets
Improper placement includes:
- Hooking over the frame or accessories
- Leaving gaps that allow movement
- Using if a front basket blocks the arm
If your bike has a front basket, child seat, or wide accessory that blocks the arm, you may not be able to use the rack.
Verify Security Before Boarding
Give your bike a gentle nudge to test stability. Confirm both wheels are fully seated in the slots, the support arm is firmly over the front tire, no part obstructs headlights or turn signals, and accessories are not dangling or loose.
Never lock your bike to the rack. This is prohibited and unsafe. Once secure, board through the front door, inform the driver you have loaded your bike, pay your fare, and take a seat near the front so you can monitor your bike through the windshield.
Unload Your Bike at Your Stop
As you approach your destination, notify the driver you will be removing your bike. Wait for their acknowledgment before preparing to exit. When the bus stops, disembark through the front door and wait on the curb side. Do not cross in front of the bus because traffic cannot see you.
To release the support arm, push in the black knob or lever and lift the arm off the tire. Swing it down and out of the way. Then lift the bike straight up and out of the wheel slots and carry it to a safe location away from traffic and the bus path.
Stow the Rack If Empty
If you are the last rider and no bikes remain on the rack, squeeze the release handle and lift the rack upward until it clicks into the locked vertical position. This ensures the rack is ready for the next user and does not interfere with the bus movement.
Let the driver know you are finished and wait until the bus pulls away before riding off.
Know What Bikes Are Allowed
Not all bikes fit or are permitted on bus bike racks. Understanding these restrictions helps you avoid problems.
Allowed Bikes
- Standard two-wheeled bikes including road, mountain, and hybrid
- Folding bikes if fully folded and brought inside the bus
- E-bikes under 55 to 60 pounds and within size limits
Prohibited Bikes
- Tandems including child-adult models
- Recumbents
- Cargo bikes
- Trikes and three-wheelers
- Gas-powered or oversized motorized bikes
- Bike-share e-bikes that are too heavy
SMART policy explicitly bans tandems, trikes, recumbents, and motorized bikes.
Check Size and Weight Limits
Even if your bike looks compatible, check these specifications before attempting to load:
- Wheel diameter: 16 to 29 inches
- Wheelbase: Up to 46 inches
- Tire width: Up to 3 inches or 76 mm
- Total weight: 55 to 60 pounds or 25 to 27 kg
Fat-tire bikes, downhill mountain bikes, or bikes with front baskets may not fit depending on the rack model.
Manage Accessories Safely
Accessories are acceptable if they do not interfere with loading or create hazards.
Acceptable accessories include:
- Fenders because the hook can rest on them
- Frame-mounted water bottles
- Lights and reflectors
- Small handlebar bags if secured
Remove these before loading:
- Front baskets or racks blocking the arm
- Child seats
- Loose panniers or saddlebags
- Tall items like milk-carton baskets
- Anything that dangles or could detach
A flapping bag can damage other bikes or obstruct the driver view.
Handle Inner Slot Loading

Loading into the middle or inner slot requires extra care, especially if the hook faces the street.
If the hook faces the curb, stand on the curb, roll the rear wheel into the track, and pull the arm over the front wheel. If the hook faces the street, stand at the centerline of the bus, never in traffic. Lift the bike at a 90-degree angle, rear wheel first, swing it past any loaded bikes, set the rear wheel in the slot, position the front wheel near the hook, and extend the arm over the tire.
Understand the Driver Role
Drivers do not assist with loading or unloading. Their responsibilities include confirming your intent, ensuring safety before you move in front of the bus, briefly delaying departure if needed, and reminding riders to secure bikes but not verifying it.
You are fully responsible for your bike safety and proper use of the rack.
Handle Full Racks and Malfunctions
If the rack is full, wait for the next bus or use secure bike parking at the stop. Do not overload the rack. If the rack is broken, do not attempt repairs. Notify the driver or call the agency customer service and use an alternative bus or route.
Prepare Before the Bus Arrives
Save time and avoid confusion by preparing early. Remove water bottles, bags, and lights. Fold any collapsible parts. Stand near the front curb-side door and signal the driver as the bus approaches. Never approach from the street side; always use the curb side.
Ride With Folding Bikes Inside
Folding bikes are welcome inside the bus but only if fully collapsed and stored properly. Size limits typically require the bike to be under 26 by 14 by 6 inches. Store it under a seat or in designated space and do not block aisles, doors, or emergency exits.
Practice Before Your Ride
First-time users should practice before their actual trip.
Training resources include:
- TriMet in Portland offers a public practice rack at PSU Transportation Information Center, 1812 SW 6th Ave, free to use during business hours
- Search for instructional videos demonstrating loading and unloading on three-bike racks
- Review online guides from GoTriangle, SMART, and The Rapid
Follow Final Safety Rules
Stay safe with these non-negotiable rules. Never crouch below the driver sightline. Never cross the street in front of the bus with your bike. Never lock your bike to the rack. Always wait for driver acknowledgment. Always stow the rack if it is empty.
Failing to follow these rules can endanger you, other riders, and delay service.
Know the Liability Policy
No transit agency is responsible for lost, stolen, or damaged bikes. Metro states it is not responsible for your property. MBTA is not responsible for stolen or damaged bikes. ART states all actions are designed to keep the rack functional and the bike safely secured.
You assume full responsibility the moment you load your bike onto the rack.
Troubleshoot Common Issues
If the rack will not lower, confirm the bus is fully stopped, re-signal the driver, and try squeezing the handle with both hands. If the hook will not reach the tire, reposition the bike slightly and check for obstructions like baskets or fenders. If still impossible, your bike may not fit that particular rack.
If you forget your bike, contact Lost and Found immediately. Provide the route number, time and location of boarding, and bike description including color, brand, and distinguishing features.
TriMet Lost and Found is available at 503-962-7655 on weekdays from 9 a.m. to 5 p.m.
Frequently Asked Questions About Using Bus Bike Racks
Can I use an e-bike on a bus bike rack?
Yes, if your e-bike weighs 55 pounds or less and meets the standard size limits. Heavier e-bikes like bike-share models cannot be used because they exceed weight limits.
Do I need to pay extra to bring my bike on the bus?
No, bringing a bike on the bus rack is completely free at all major transit agencies across North America.
What if the bike rack is already full when the bus arrives?
Wait for the next bus or use secure bike parking at your transit stop. Do not attempt to overload the rack with a third bike.
Can I bring my bike inside the bus instead of using the rack?
Only folding bikes that are fully collapsed may be brought inside. Standard bikes must use the exterior rack or be stored at your destination.
Who is responsible if my bike gets damaged on the bus?
You are fully responsible. No transit agency assumes liability for lost, stolen, or damaged bikes or accessories.
What should I do if the bike rack is broken or malfunctioning?
Do not attempt repairs. Notify the driver immediately and use an alternative bus route or transportation option.
Key Takeaways for Mastering Bus Bike Rack Usage
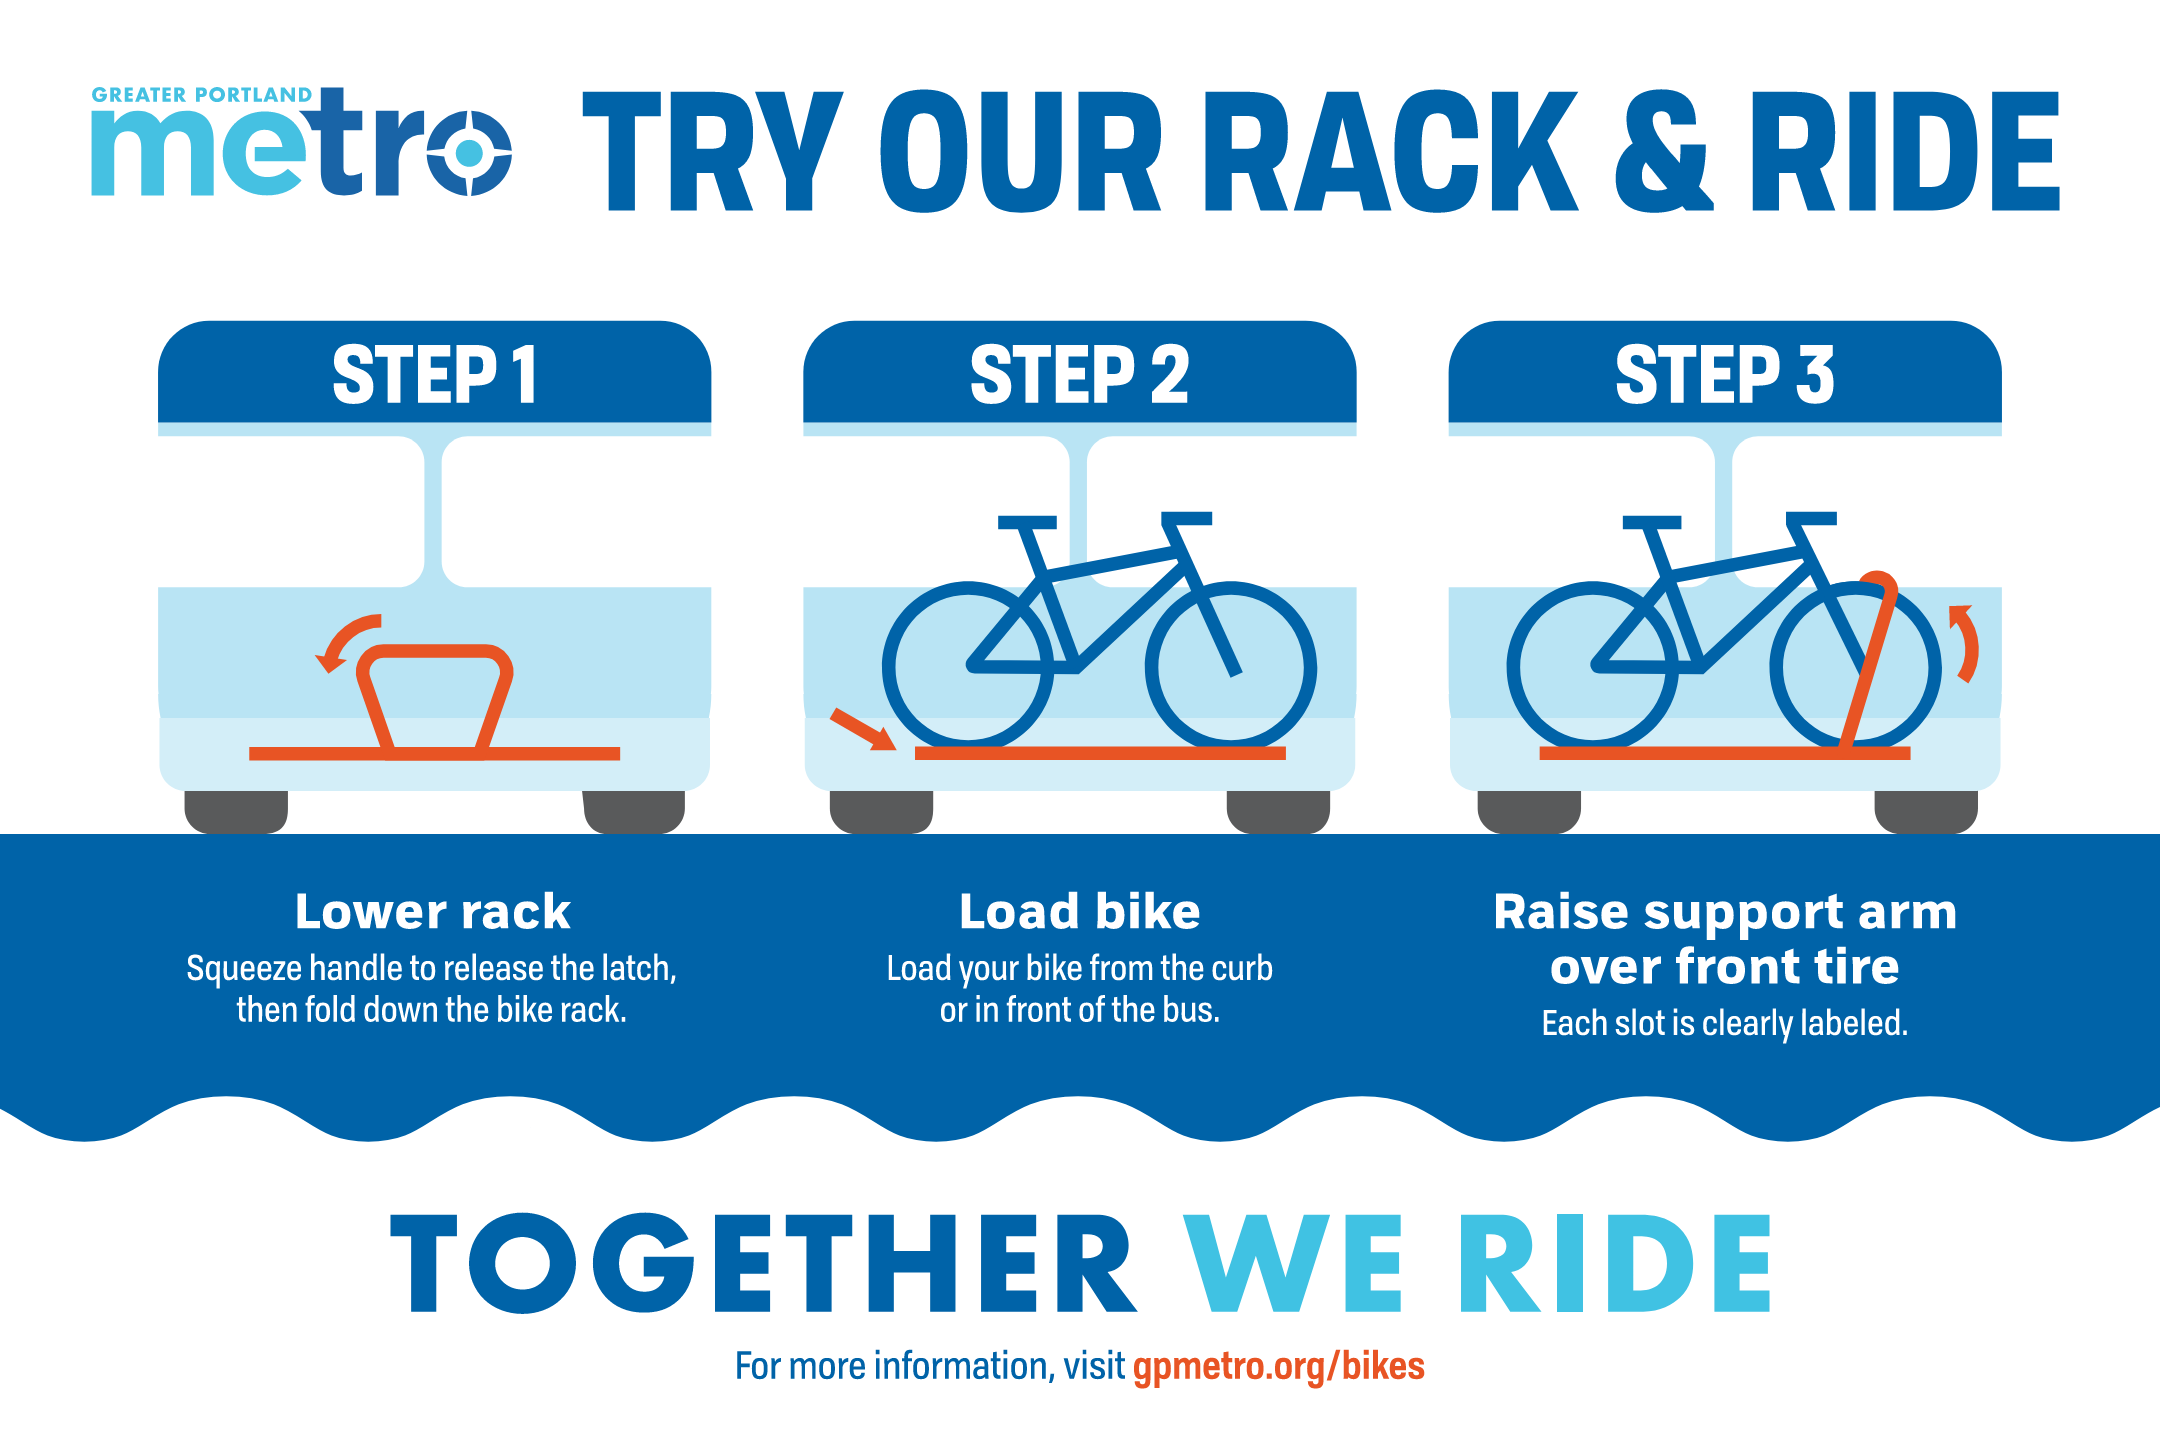
Using a bus bike rack is a simple, free way to extend your ride and combine cycling with public transit. The process follows a consistent five-step pattern across most North American transit agencies: load, secure, ride, unload, and stow. Always approach from the curb side, get driver acknowledgment before approaching the front of the bus, and use the outermost slot first except in Boston where MBTA requires the inner slot first. Remove all loose accessories before loading and ensure the support arm hooks firmly over the front tire near the frame. Remember that you assume full responsibility for your bike from the moment you load it until you remove it. Now go ride your bike to the nearest bus stop and try these steps on your next multimodal adventure.


